To configure and manage brands in your WooCommerce store, follow these steps:
- Access the Brands settings: Go to Bright Plugins > Brands Settings to view the general settings.

2. Slug: This feature allows you to add your own taxonomy for brands. By default, it is “Marca”.Important Note: To avoid 404 errors, each time you change the slug, you will need to re-save your permalinks.
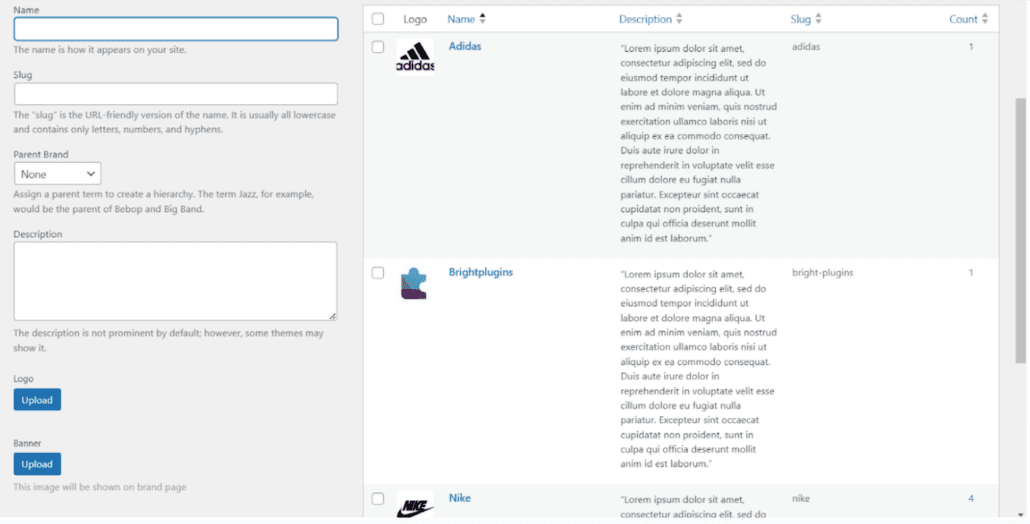
3. Link to Brands: By clicking on this ‘Brands’ link, you will access the brands taxonomy page to manage your brands.

You will see this interface to manage and organize your brands:

Product Page #
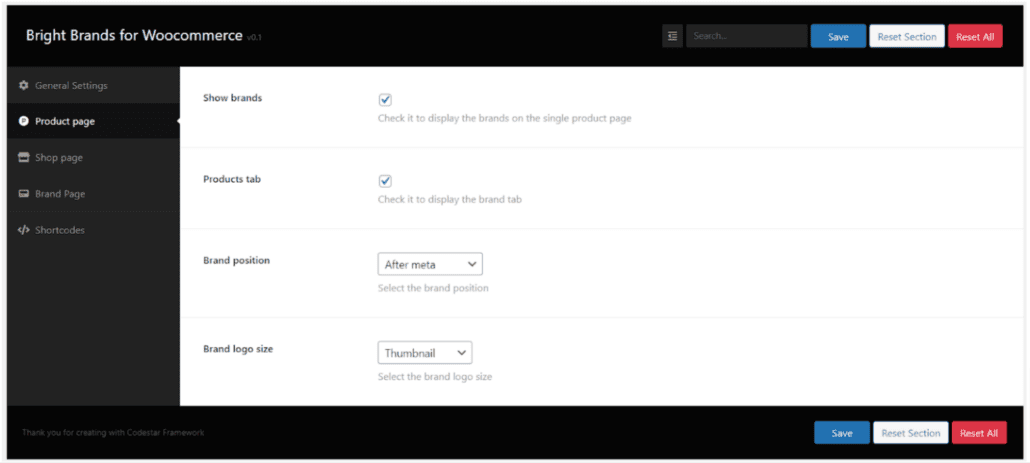
In the Product Page tab, you can configure how the brands should appear on the product pages that have already chosen a brand.

- Show brands: If you want to display the product’s brand on individual product pages, all you need to do is enable this option.
- Products Tab: Enable this option to display the brand tab on individual product pages. Within this tab, customers will see information about the product’s brand.
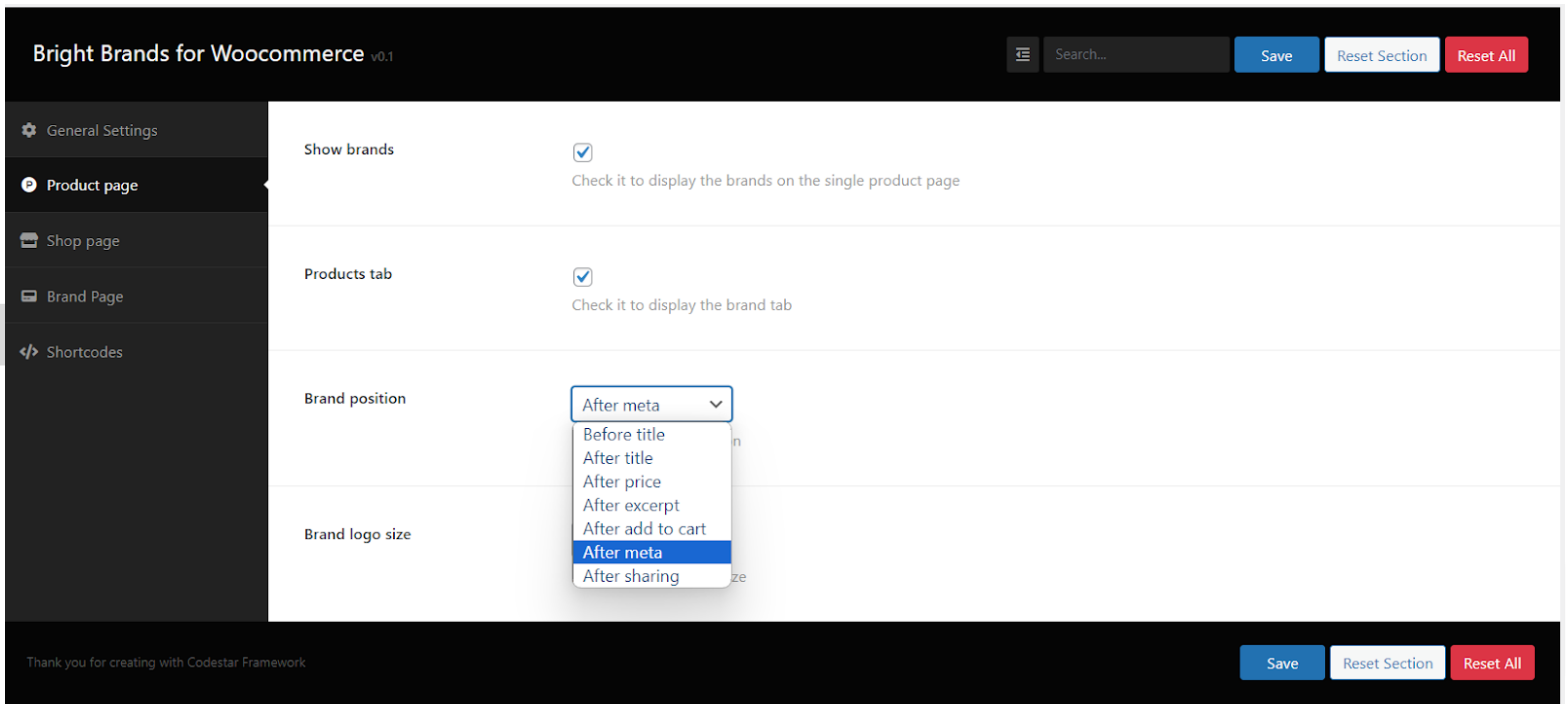
- Brand Position: With the Brand Position option, you can choose where to display the brand. The available options are.

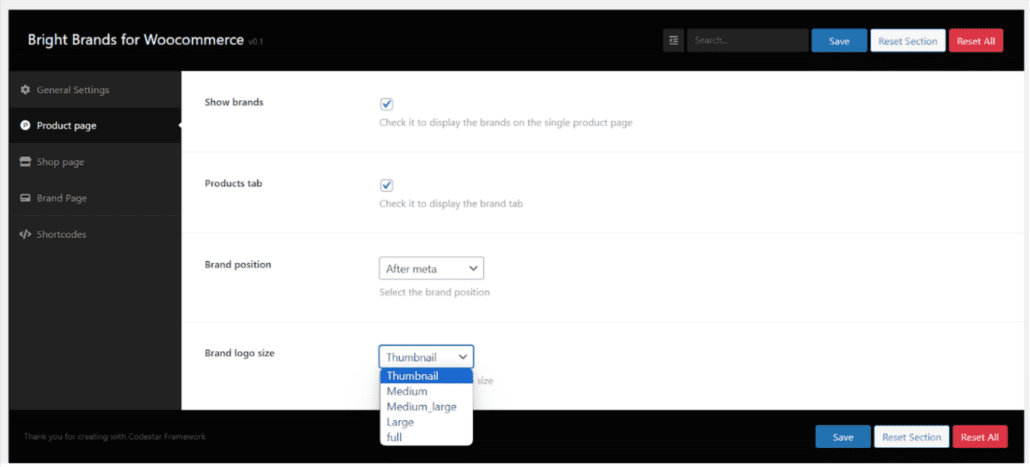
4. Brand Logo Size: With the Brand Logo Size option, you can choose the logo size on individual product pages. The available options are.

Additional Tips #
Optimizing Brand Visibility #
To maximize the visibility of your brand on product pages, consider placing the brand logo in a prominent position. This will help in reinforcing brand recognition among your customers.
Customizing Brand Display #
WooCommerce allows for a great deal of flexibility in how brands are displayed. You can customize the size, position, and even the style of the brand logo to match your store’s theme and aesthetic.
Regular Updates #
Make sure to regularly update your brand settings and review the display on different devices. This ensures that the brand presentation remains consistent and visually appealing across all platforms.
Importance of Branding #
Understanding the role of branding in e-commerce is essential for enhancing your store’s appeal and customer loyalty. For more insights on the significance of trademarks in e-commerce, you can read this article.
Summary #
This guide is designed for WooCommerce store administrators who want to manage and display brands on their products. By following this guide, you can customize how brands are presented in your store, thereby improving customer experience and strengthening your product identity.