
In this guide, we will teach you how to display all available pre-order products on a separate page in your WooCommerce store. This process will allow you to efficiently organize and present pre-order items, enhancing the browsing experience for your customers.
Step 1: Verify Plugin Compatibility
Before you begin, make sure you have the premium version of the plugin that enables the pre-order functionality in WooCommerce installed and activated. Without this plugin, you won’t be able to use the necessary shortcode to display pre-order products.
Step 2: Create a New Page for Pre-Order Products
- Log in to your WordPress admin panel.
- Navigate to
Pages>Add New. - Page Title: Enter a relevant title, such as “Preorder Page”.
- Page Content: In the content editor, insert the following shortcode:
[preorder_products]
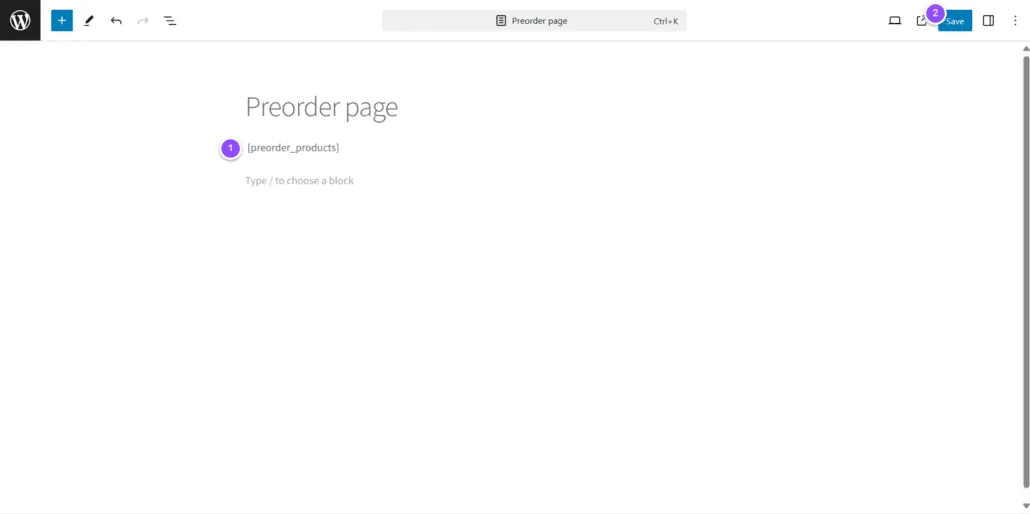
This shortcode will automatically display all available pre-order products on the page.
Step 3: Publish the Page
- Review the Page: Ensure that the content and design are as desired.
- Publish: Click the
Publishbutton to make the page visible on your store.
Step 4: Add the Page to the Navigation Menu
To facilitate access to the pre-order products, add the new page to your store’s main menu.
- Navigate to
Appearance>Menus. - Select your store’s main menu.
- Add Item: Find the page you just created in the list of available pages and click
Add to Menu. - Save Menu: Arrange the position of the new page in the menu and save the changes.
Frequently Asked Questions
What if I don’t see the pre-order products on the page?
Make sure the products are correctly set to pre-order status and that the [preorder_products] shortcode is correctly inserted on the page.
Additional Notes
- Plugin Compatibility: Ensure all plugins are up-to-date and compatible with each other to avoid conflicts.
- Support: If you encounter any issues, refer to the pre-order plugin documentation or contact the technical support.
By following these steps, you should be able to set up an effective page to showcase your pre-order products, improving both user experience and the SEO of your WooCommerce store.
Email Templates for Pre-Order>
Updated on April 22, 2026 · Need help? Open a support ticket