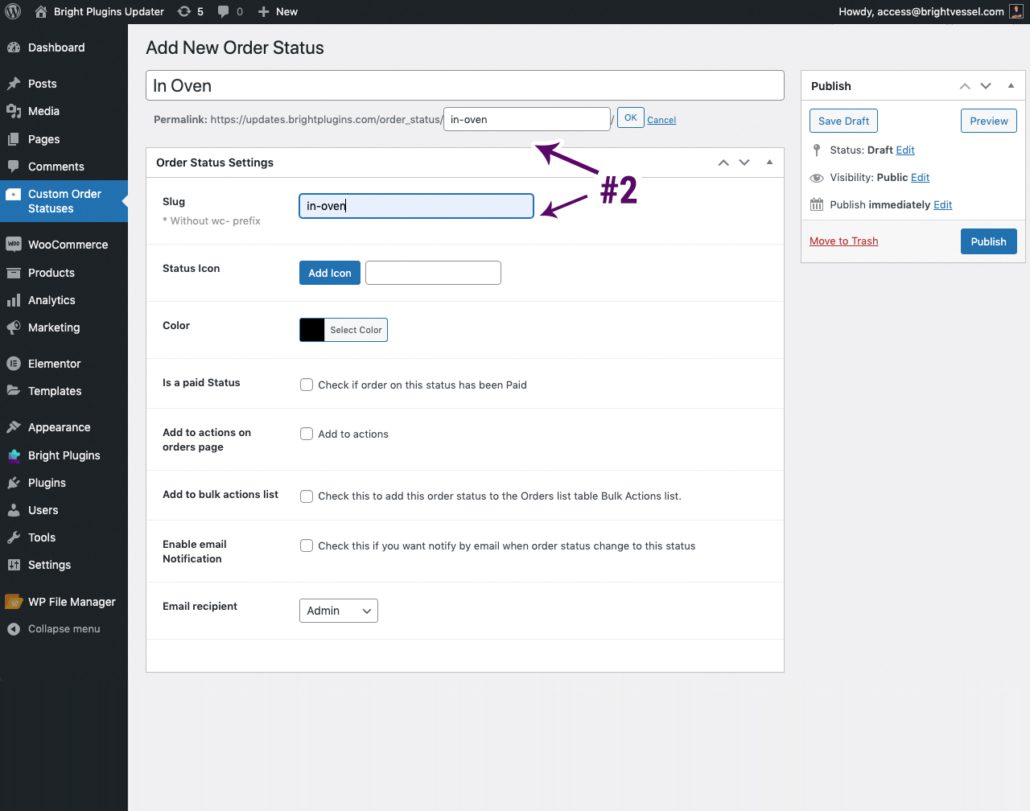
Navigate to WooCommerce > Order status Menu and click the “Add New” button.


![]()
![]()

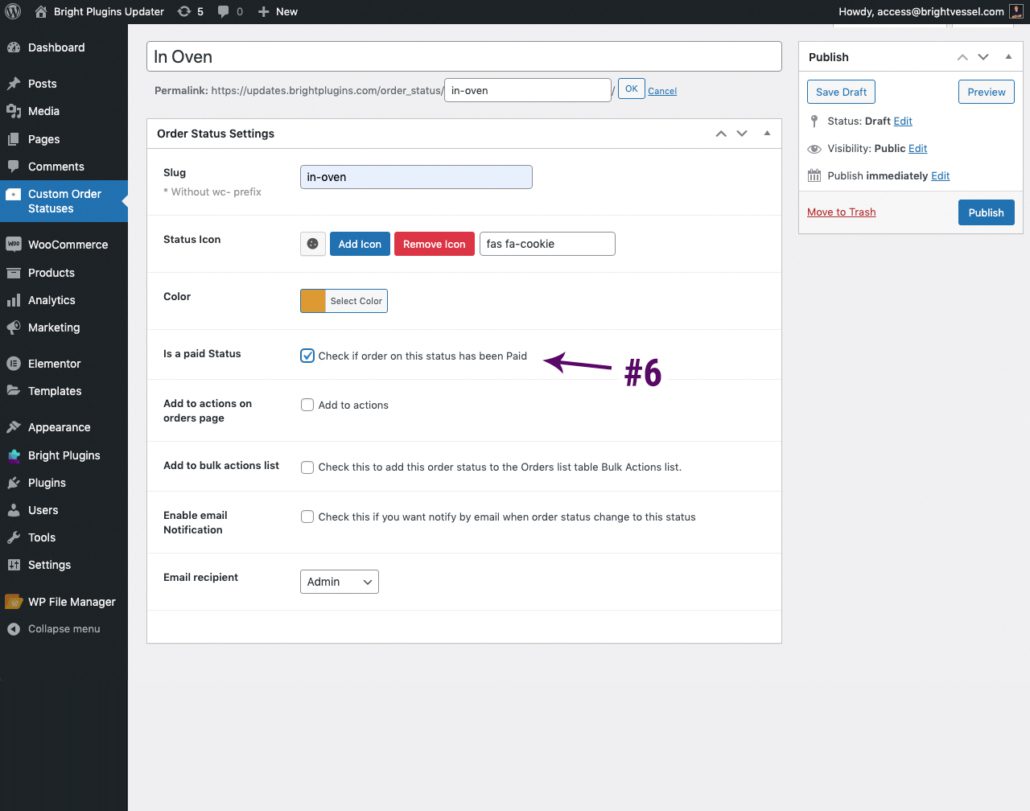
If you check this option, it will include download links, purchase notes, or other features when customers view these orders. Think of it as being between processing and complete.
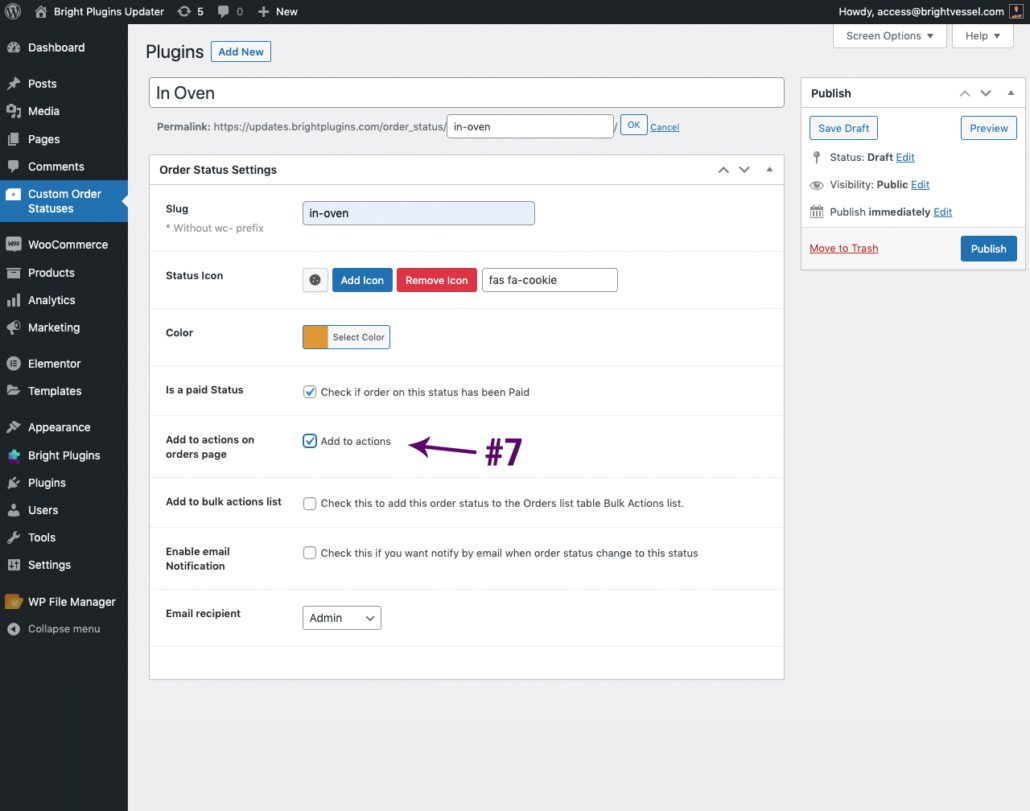
if you check this option. It will be included in the orders view and actions icon.
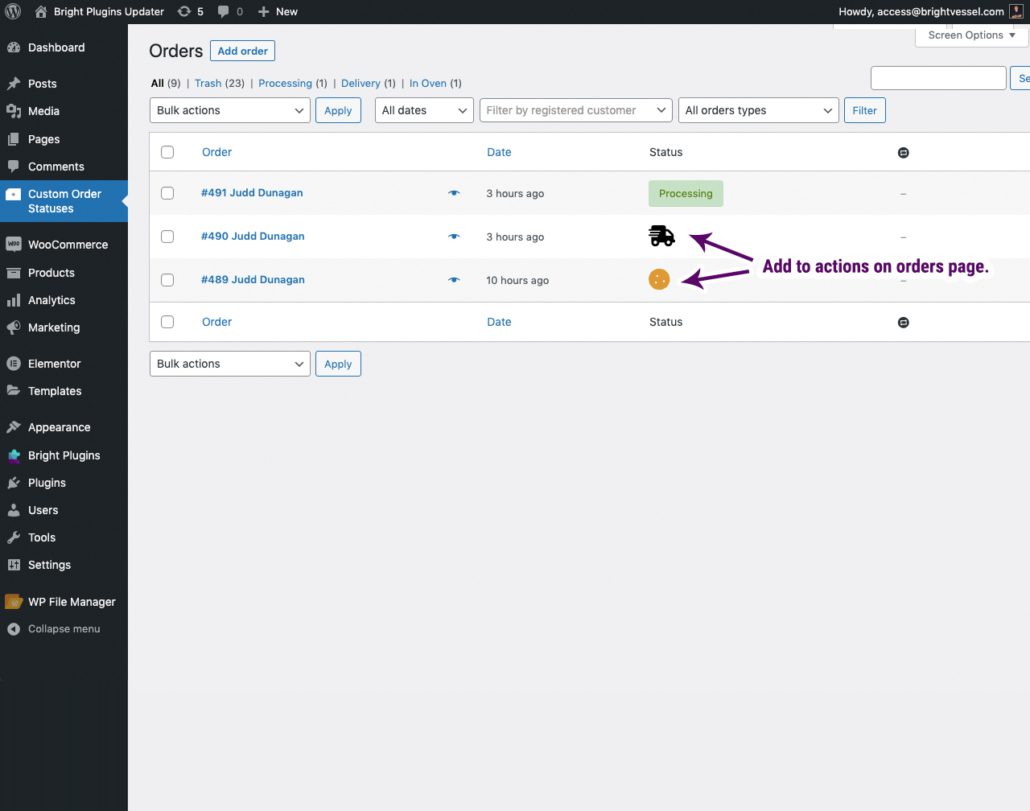
Add to actions on the orders page. This is the view of what the setting adds to the orders page. There is a new “Status” Column.
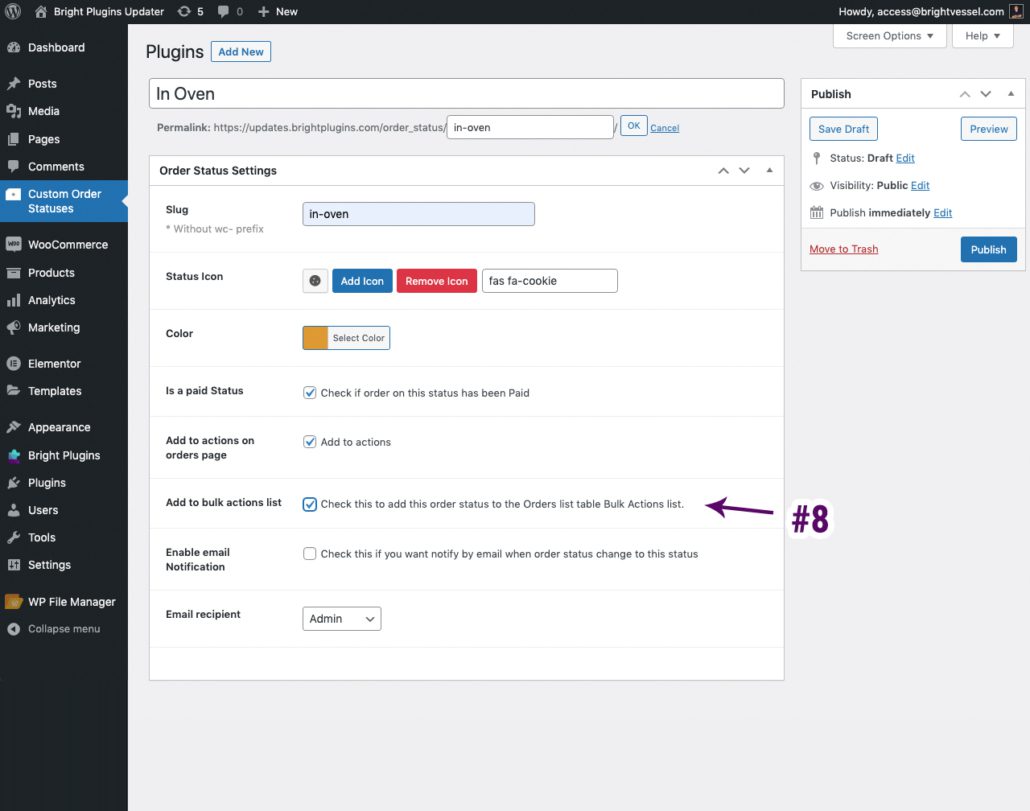
This feature will allow you to bulk edit your status on the order page if checked.

Add to bulk actions list. This is the view of what the setting adds to the orders page. You can bulk edit the orders to one of the custom statuses.
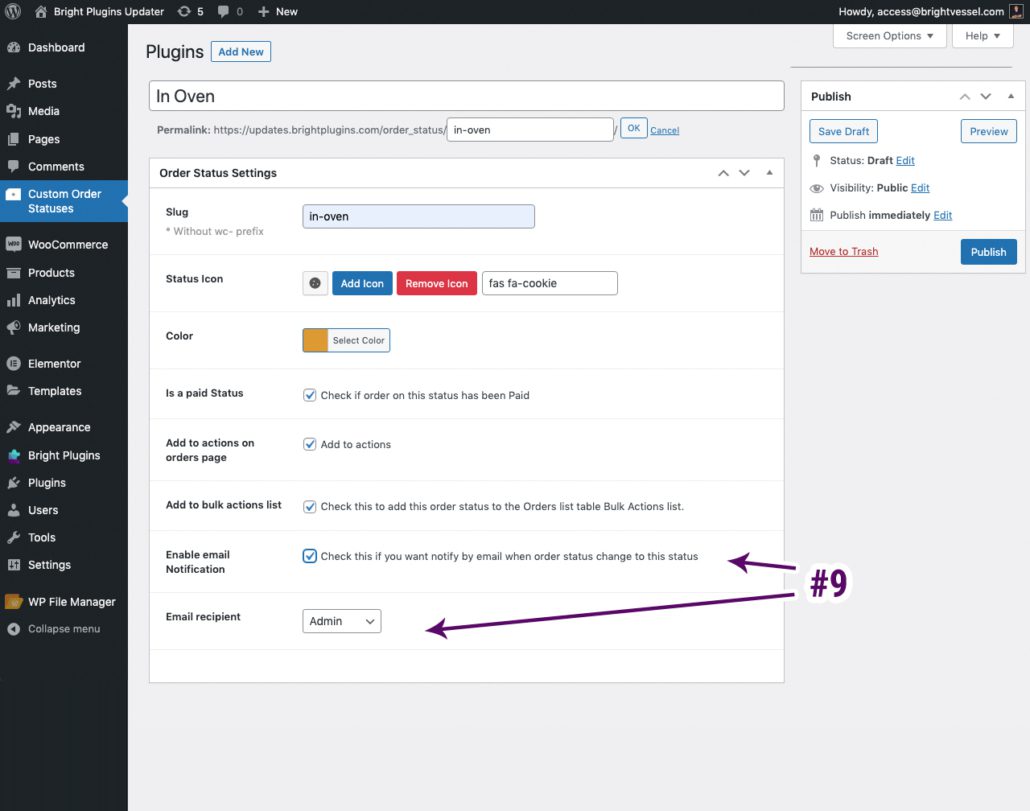
This will allow an email notification to go when the status is changed. You must have this checked for the notifications to work. You can select an internal notification for admins or the status you want the customer to receive. If you want both the admin and customer to get email notifications then you need to select “Customer” as Email Recipient and add the admin email as an email copy.
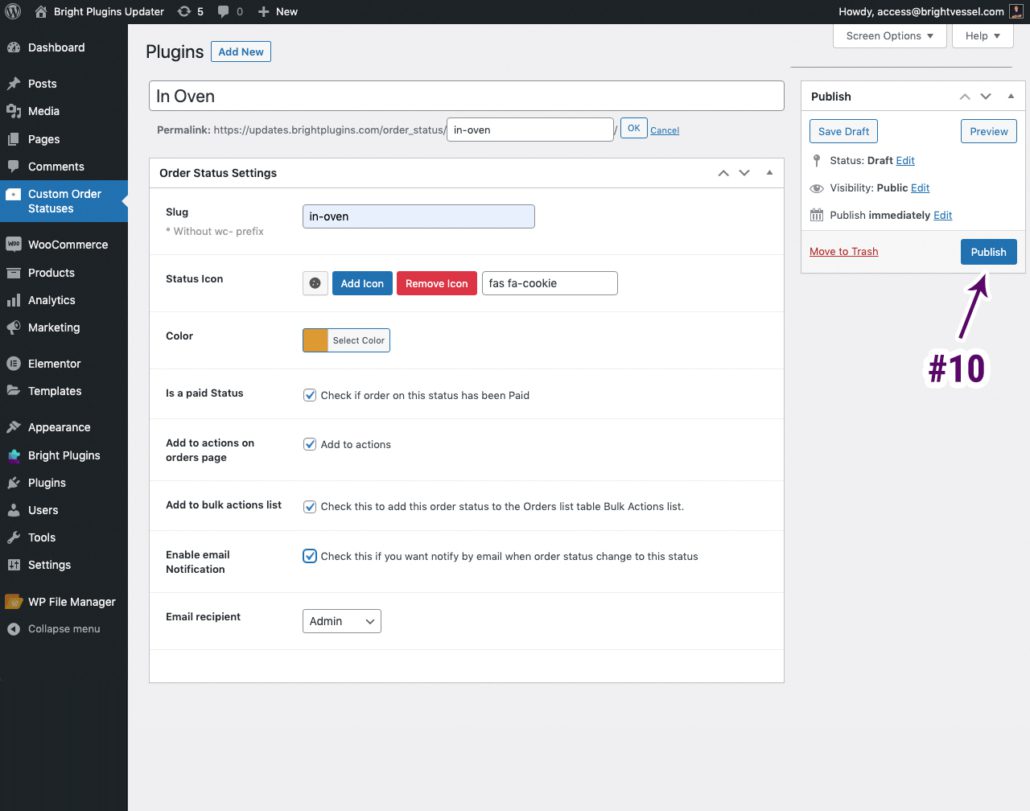
Click Publish

Note: Edit Order Status
To edit order status. You would click on the “Custom Order Status” tab. Here you will have the list of the customer order status, which you can click on to edit.