General #
On the General tab you can see the general options of the plugin and configure the global behaviour..

Hide shipping fields if Local PickupIt #
will hide the shipping fields when Local Pickup shipping method is selected
Estimate delivery time #
On this section you configure options for the delivery time estimation. You can read more this on the article How to show estimated delivery date instead of choosing a date on checkout
Show estimate delivery time on checkout #
Show/Hide delivery estimated time information.Usually used if delivery date and pickup date are both disabled. It shows the estimated time for delivery based on the minimum preparation time (Default minimum delivery time in hours).Uses current checkout time for calculation.Default Minimum delivery time (in hours): Default brew time in hours, used if there is no other specific setting on a product or a day of the week that may have a different brew time.Text label to estimate delivery date: Text to show on checkout pageCustom css class: CSS class appended to the HTML element on checkout page
Global Limits #
On this section are configured limits like time and quantity. These settings are overwritten by the weekday settings.
Same day cutof #
timeDo not allow choosing delivery timeslots after this time on same day order.
Next day cutoff time #
Do not allow choosing delivery timeslots after this time on next day.
Delivery Timeslot order Qty #
Determines the number of orders that can be placed on the same timeslot.
The timeslot is hidden upon reaching the limit, and it is not possible to choose it during checkout. ]
Applied only if the “Delivery Time ” is enabled. You must consider the delivery date in addition to the chosen slot.
Limit of product quantity #
Limit daily product quantity can be ordered / delivered.
Pickup Timeslot order Qty #
Limit the number of orders on same timeslot for local pickup.
Determines the number of orders that can be placed on the same timeslot.
The timeslot is hidden upon reaching the limit, and it is not possible to choose it during checkout.
Applied only if the “Pickup Time ” is enabled (inside Pickup Time section). Must consider pickup date in addition to chosen slot
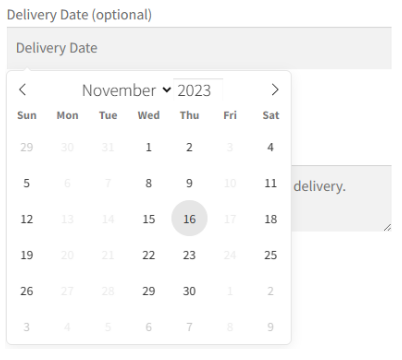
Calendar Appearance #
On this section you can configure the calendar language and the date format for displaying the calendar in checkout.
Calendar Locale #
You can set the calendar language. It changes the month and weekdays according to language
being applied in the delivery date field and in the pickup date
Date format #
Date format shown on checkout, email and orders page. In each order with delivery date, an additional postmeta is also recorded with the date in the format yyyy-mm-ddExample of how it shows on checkout
Business days Settings #
On this tab are configured the days available for Delivery and the days available for Picking.
Holidays can be set on the “Spicific days off” section

You can set the Delivery days under Business days Settings.
The weekdays unchecked will be hidden in checkout calendar. This feature is ignored if no weekday is set
Working weekdays #
Delivery Days #
Weekdays available on calendar. Default ALL if nothing selected 
Pickup Days Days #
Weekdays available on calendar. Default ALL if nothing selected 
Specific Days off #
You can set specific days to hide on calendar, like holidays.
- Delivery Days offDisable specific dates on calendar. Click on Add New to include days.

Choose the year, month and daysLabel: A description for this setting, default is the Month and YearYear / Month: Fill the year and month for these daysDays: Comma-separated days, it is ignored if empty

- Pickup Days offDisable specific dates on calendar. Click on Add New to include days.

Choose the year, month and daysLabel: A description for this setting, default is the Month and YearYear / Month: Fill the year and month for these daysDays: Comma-separated days, it is ignored if empty

Global Delivery Settings #
On this tab are configured the Delivery Options according to your needs

- Enable delivery dateAllows you to choose delivery date at checkout

- Allow Customer edit the delivery dateCustomer can change the delivery date from My Account / My Orders section

- Enable delivery timewhen turned on, allows you to choose a time slot at checkout. Time slots are generated according to the following options

Delivery timeslots #
On this are is generated the timelots available for deliverying according your business.
- Timeslot Begin – EndIt can be considered business hours, of time slots are generated taking into account this time range

- Timeslot durationDuration of each generated time slot in minutes

- Time formathow the time will be shown at checkout

- Timeslots example on checkoutGenerates the timeslots for checkout page, according to the Timeslot DurationFor example Begin at 8 am, End at 3pm, with 50 minutes interval, this setting generates the f

following timeslots on checkout:
Global delivery limits #
These settings are applied when there is no weekday setting
Minimum order amount for no delivery charge #
set the Delivery fee = 0 if the order amount reaches this value
Google Calendar Steps to config1 – Google Calendar API requires PHP V7.4+ and some PHP extensions.2 – Go to Google APIs console by clicking https://code.google.com/apis/console/. Login to your Google account if you are not already logged in.3 – Click on “Create Project”. Name the project “Deliveries” (or use your chosen name instead) and create the project.4 – Click on APIs & Services from the left side panel. Select the Project created.5 – Click on “Enable APIs and services” on the dashboard. Search for “Google Calendar API” and enable this API.6 – Go to “Credentials” menu in the left side pane and click on “CREATE CREDENTIALS” link and from the dropdown that appears select “Service account.”7 – Enter Service account name, id, and description and Create the service account.8 – In the next step assign Owner role under Service account permissions, keep options in the third optional step empty and click on Done button.9 – Now edit the Service account that you have created and under the “Keys” section click on Add Key>> Create New Key, in the popup that opens select “json” option and click on the CREATE button. A file with extension .json will be downloaded.10 – Using your FTP client program ( e.g.: FileZilla, WinSCP ), copy this key file to your server, in some non public web public folder like /var/www/credentials, but be sure it can be readable by the webserver user (usually www-data). This file is required as you will grant access to your Google Calendar account even if you are not online. So this file serves as a proof of your consent to access to your Google calendar account.
Note: This file cannot be uploaded in any other way. If you do not have FTP access, ask the website admin to do it for you.11 – Copy the full path to your file: It is something like /var/www/credentials/your-google-project-name-OY7364-huj72.json and paste it to the field “Json Credentials full path” on Google calendar settings.12 – Copy “Service Account ID” from Manage service account under API service-> Credentials of Google apis console and paste it to “Service account email address” setting of Order Delivery Date.13 – Open your Google Calendar by clicking this link: https://www.google.com/calendar/render14 – Create a new Calendar by clicking on “+” sign next to “Other Calendars” section on left side pane. Try NOT to use your primary calendar.15 – Give a name to the new calendar, e.g. Delivery calendar. Check that Calendar Time Zone setting matches with time zone setting of your WordPress website. Otherwise there will be a time shift.16 – Create the calendar and once it is created click on the Configure link which will appear at the end of the page, this will redirect you to Calendar Settings section. Paste already copied (from step 12) “Service Account ID” from Manage service account of Google APIs console to “Add People” field under “Share with specific people”.17 – Set “Permission Settings” of this person as “Make changes to events” and add the person.18 – Now copy “Calendar ID” value from Integrate Calendar section and paste the value to “Google calendar id” field of Plugin settings.
Delivery chargeDefault fee for the delivery service, it is added to the cart as delivery fee. Used if there is no weekday specific delivery fee.
Delivery date change access Hrs.Specify how many hours an user has to change the delivery date after placing an order
Enable Delivery charge according to number of daysEnable Delivery Charges Based on Number of Days (Urgent Delivery Charges).
This overwrites any other delivery fee.
This setting is not overwritten by week delivery charge.

Additional charge by days from current dayAdditional Charges Based on Number of Days from Current DateLabel: A description to the changeNumber of days: Days of urgency for this feeAdditional Delivery Fee: The amount to be included in cart

Weekdays Schedule SettingsCustomize the delivery schedules and limits by weekdayWeekday: The day of the week to apply the settingMinimum delivery time (in hours): Minimum number or hours to prepare to delivery, this overrides the default (global) settingMax number of deliveries for this weekday: Do not allow new deliveries if the limit is reachedMessage for reaching max quantity: Message when it reached the max orders quantityMax number of deliveries for each timeslot: Do not allow new deliveries if the limit is reachedMessage for not available slots: Message when all slots reached the max quantityDelivery charge for this weekday: The delivery fee for this weekdayMinimum order amount for no delivery charge on this weekday: Sets fee = 0 when order amount reaches this valueCutoff time: Enable cutoff timeWeekday cutoff time: Block choosing delivery timeslots after this time on this weekday.
This setting overwrites the global cutoff timeProducts: Products to apply this weekday settingProduct Categories: Categories to apply this weekday setting

Restrict delivery date only for the products bellowIt shows the delivery date field only for the selected product / categories. If it is turned off, it will show delivery date field according the default “Enable delivery date” setting

ProductsThe list of products available for delivery, all settings will be applied only for these products

Product CategoriesThe list of categories available for delivery, all settings will be applied only for these product categories

Enable pickup datewhen turned on, allows you to choose a pickup date at checkout.
Enable pickup timewhen turned on, allows you to choose a time slot at checkout. Time slots are generated according to the following options
Timeslot Begin – EndIt can be considered business hours, of time slots are generated taking into account this time range
Timeslot durationDuration of each generated time slot in minutes
Time formathow the time will be shown at checkout
Location field requiredLocation pickup required on checkout
Pickup Locations labelThe text on locations field at checkout

Pickup LocationsAdd the pickup locationsLocation name: The Pickup-up location nameLocation Address: The Pickup-up location AddressProducts: Products available to pickup. It enables this location only for the chosen products

Enable custom schedulesIt enables the custom schedules. This settings has precedence of all other
Weekdays Schedule Settings:Customize Days and Time on specific weekdaysWeekday: The weekdays to apply this settingsEnable/Disable Delivery Time: Enable timeslots on checkoutTimeslots: Choose if want to generate the timeslots based on a given time and duration, or if want to specify each timeslots manuallyTimeslot Begin – End: Begin – end for generating timeslotsTimeslot duration: Duration in minutes for each generated timeslot
Weekdays Schedule Settings:Customize Days and Time on specific weekdaysWeekday: The weekdays to apply this settingsEnable/Disable Delivery Time: Enable timeslots on checkoutTimeslots: Choose if want to generate the timeslots based on a given time and duration, or if want to specify each timeslots manuallyTimeslot Begin – End: Begin – end for generating timeslotsTimeslot duration: Duration in minutes for each generated timeslot
Enable google calendar IntegrationSend new delivery orders to the google calendar
Json Credentials full pathPath to the Google credentials json file like: /var/www/credentials/yourgoogleproject-1234.json
Try not using a public web folder
Enable google calendar IntegrationFill with the calendar id