
Setting minimum and maximum quantities for simple products in WooCommerce is essential for managing your store’s inventory and controlling sales. This guide will walk you through the steps to configure these limits using the Bright Plugins extension.
Why Set Min/Max Quantities?#
Setting minimum and maximum quantity limits can help you:
- Prevent Stockouts: Ensure that customers do not buy more than what you can supply.
- Encourage Bulk Purchases: Set a minimum quantity to encourage customers to buy more.
- Control Sales: Manage the flow of products and prevent over-purchasing
Step-by-Step Guide to Configure Min/Max Quantities for Simple Products#
- Access the Product:
- Navigate to WooCommerce > Products and select the product for which you want to set quantity limits.
- Navigate to WooCommerce > Products and select the product for which you want to set quantity limits.
- Verify Product Type:
- Ensure the product is set as a Simple Product, which is the default setting.
- Ensure the product is set as a Simple Product, which is the default setting.
- Configure Quantity Limits:
- Navigate to the Min & Max Qty section. By clicking on it, you can set the minimum and maximum quantity limits as well as the quantity step.
- Click Update to save your changes.
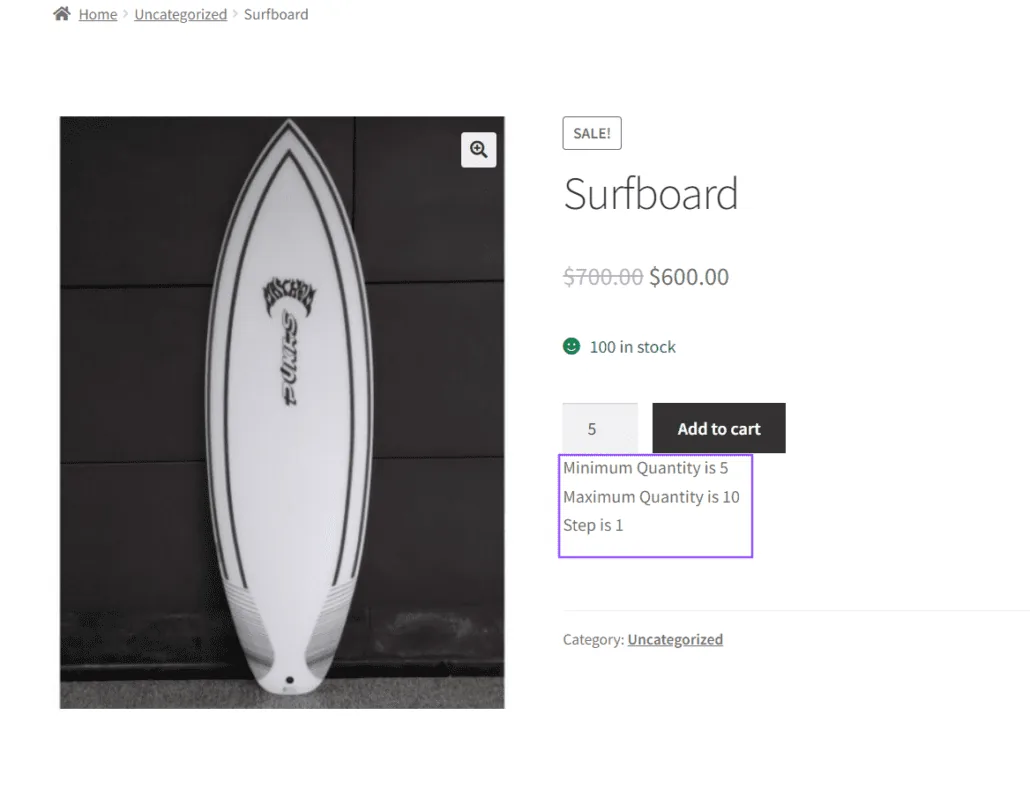
- Verify Limits:
- You will see the established limits on the selected product before adding it to the shopping cart. This ensures that the limits are correctly applied to simple products.
5. Verify Limits:
- You will see the established limits on the selected product before adding it to the shopping cart. This ensures that the limits are correctly applied to simple products.
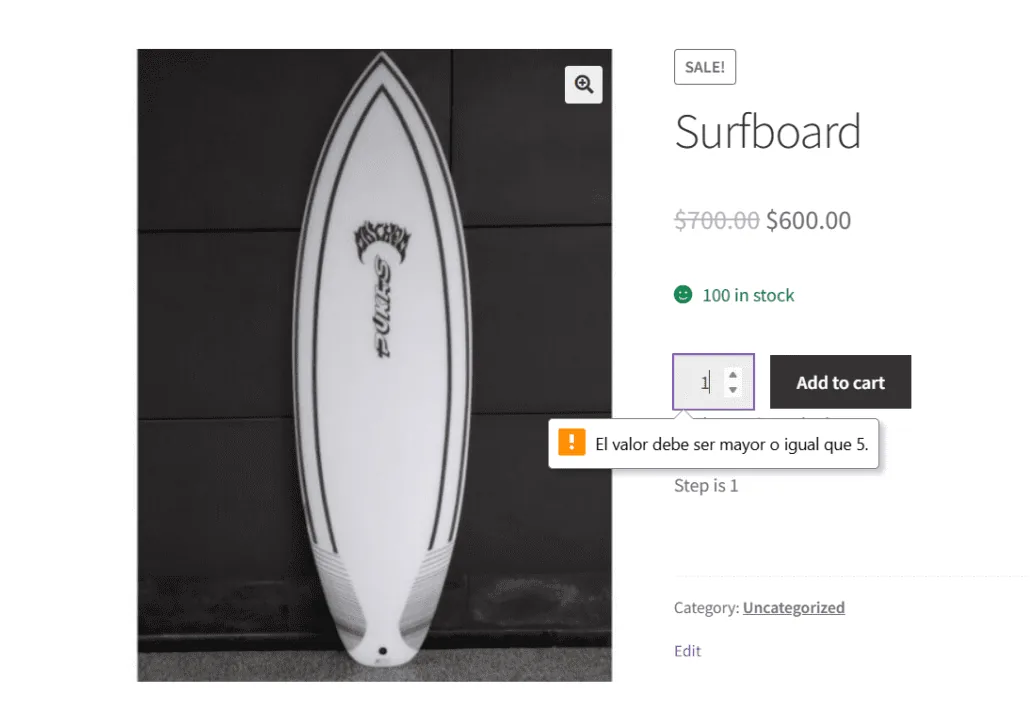
6. Quantity Error Notices
- If the user selects an incorrect quantity of items, the interface will display a notice indicating that the quantity is outside the established limits.
Common Issues and Resolutions with Bright Plugins#
Problem: Limits Not Displaying Correctly#
- Solution: Ensure the product is set as a simple product and that the settings under the Min & Max Qty section are configured correctly. Bright Plugins provides a user-friendly interface to easily verify these settings.
Problem: Quantity Error Notices Not Appearing#
- Solution: Double-check that the Bright Plugins extension is properly installed and activated. Make sure the settings are applied and that WooCommerce is up to date. Bright Plugins offers dedicated customer support to assist with these issues.
For more detailed information on managing products in WooCommerce, you can refer to the WooCommerce Documentation – Managing Products.
Updated on April 16, 2026 · Need help? Open a support ticket