
It is fairly simple if you want to accept PayPal Payments
First you need to add your PayPal account on the Payments settings page and tick the transfer to payment provider.
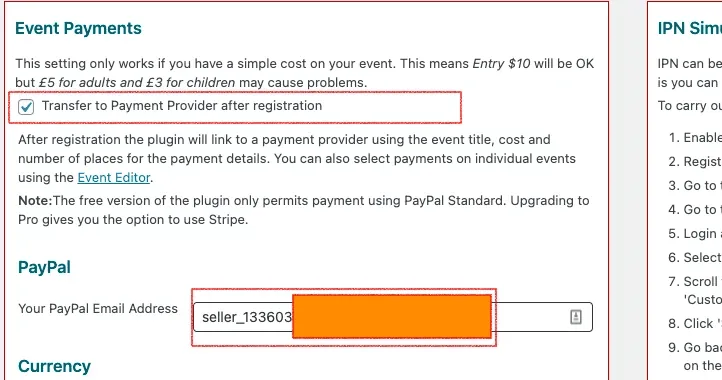
And also on the events you want payment make sure the transfer to payment provider is ticked.
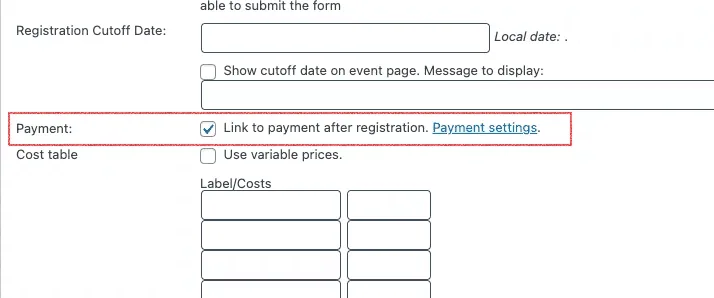
That is it. Any event with a cost will fire up a PayPal payment screen.
However, note like this, any registration will be accepted ( and notifications sent ) even if the PayPal payment is not completed. It is important to understand this.
The registration would appear as ‘pending’ on the reports. And you would need to manually check your PayPal and if you desire, manually change ‘pending’ to ‘paid’.
However, most business would prefer that payment status is changed automatically. This is where Instant Payment Notification (IPN), a PayPal setting, comes into play. This is only available on Business PayPal accounts. It is free to change your PayPal account to business although they will want proof, e.g. Incorporation certificate or Self employed tax reference. I would expect most people using this plugin to take payments for events would qualify for a Business PayPal account.
Simply tick IPN processing and set up your PayPal account to send the IPN to the right place – see https://developer.paypal.com/docs/api-basics/notifications/ipn/IPNSetup/
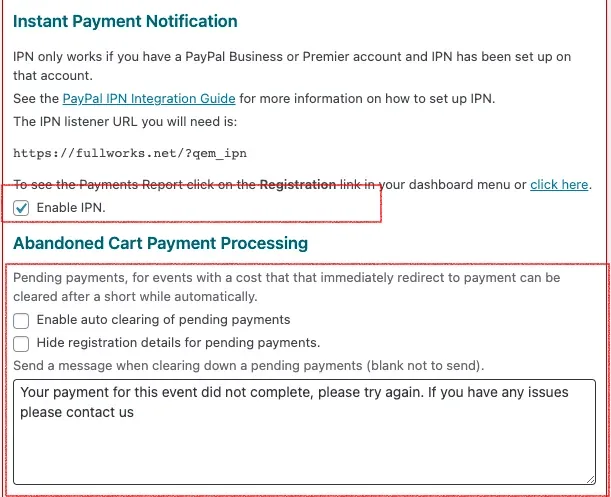
You may also want to enable ‘Abandoned Cart Payment Processing’ so any registration that payment has not completed in a couple of hours gets automatically removed totally rather than sitting in ‘pending’ state.
Finally, you probably want to set the ‘Auto Responder’ to send ONLY after payment is confirmed.

Updated on April 22, 2026 · Need help? Open a support ticket