
Pre-Orders lets you sell a product before it is available, capture demand early, and give customers a clear availability date so they can reserve with confidence.
When to use Pre-Orders#
Pre-orders earn their place when the thing you are selling is real but not yet in hand. Reach for them when you want to:
- Launch an upcoming product and bank the first wave of sales before stock lands
- Test whether demand justifies a restock, before you commit the money
- Manage a release with a date customers can plan around
- Take reservations without pretending the item is on the shelf today
What customers will see#
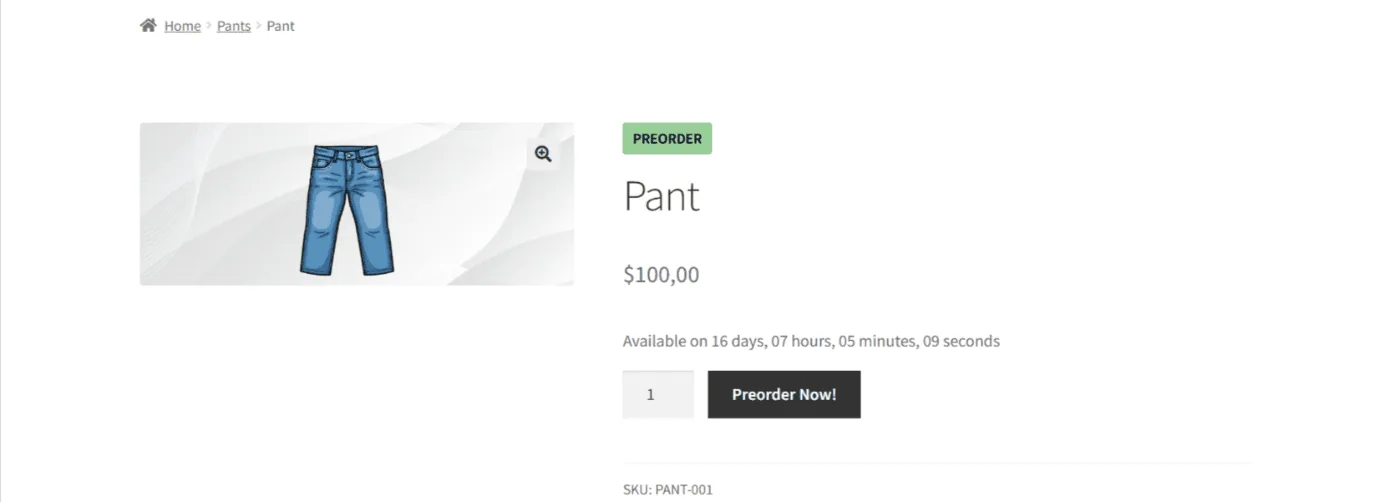
The point of a pre-order is that nobody is surprised at checkout. Once the product is configured, a shopper sees a badge marking it as a pre-order, the date it becomes available, and a button that says so plainly rather than the usual add-to-cart.
That clarity is the feature. A customer who knows the jacket ships in six weeks and orders anyway is a customer who will not open a support ticket in week two.
Quick setup in 3 steps#
1. Enable Pre-Orders#
Install and activate the plugin from Plugins in your WordPress dashboard. Nothing else needs configuring before your first product — the defaults are sensible, and you can revisit them once something is live.

2. Set up a pre-order product#
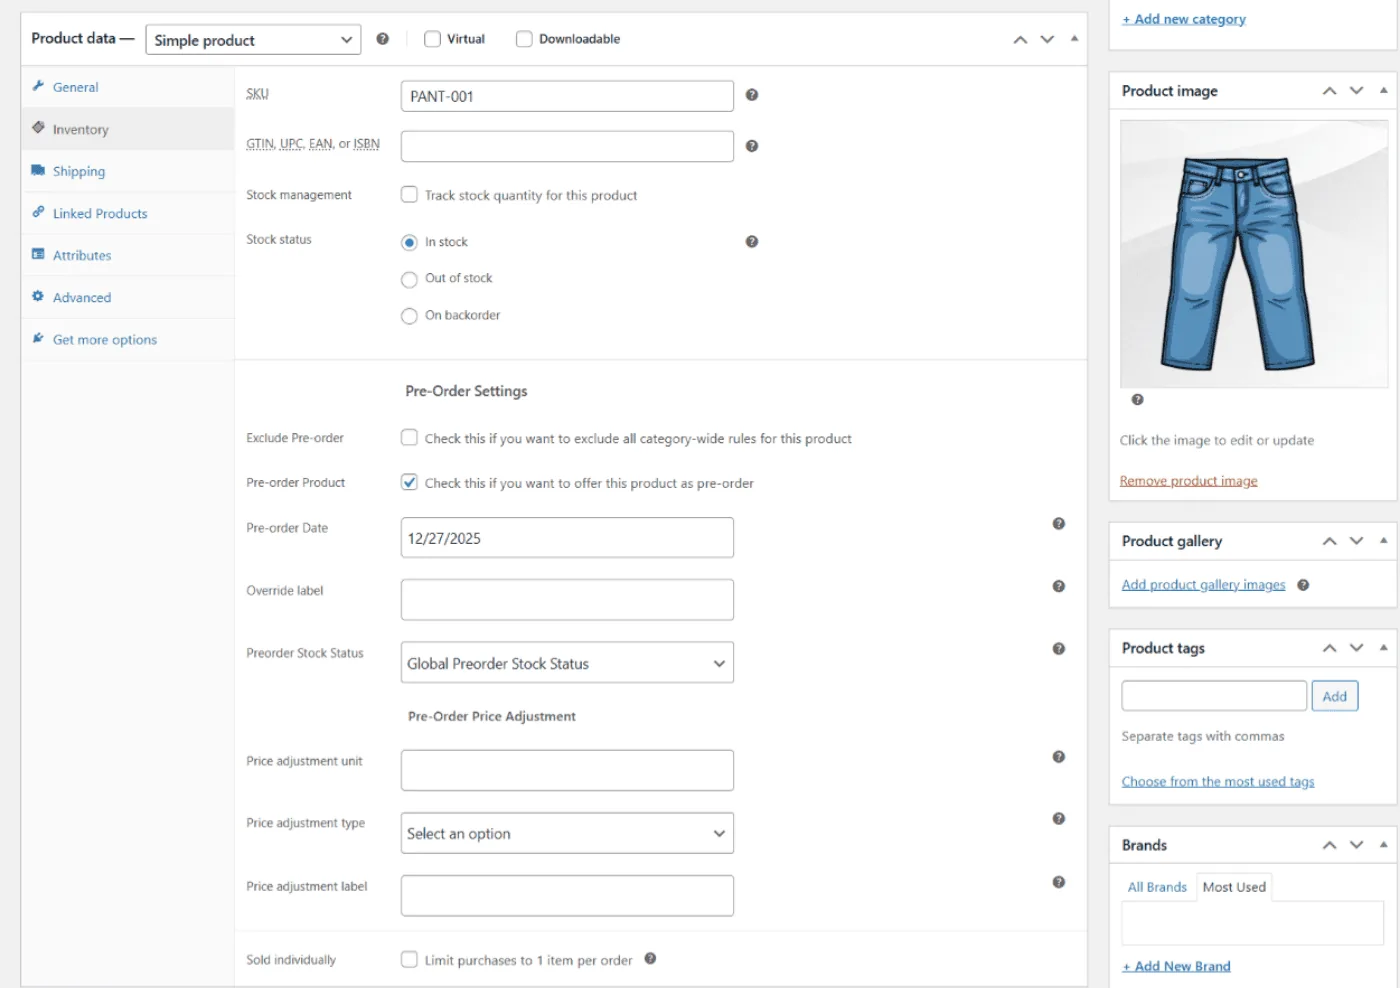
Go to Products → Edit Product, open the Pre-Order Settings panel, turn the option on, and set the availability date.
That date is the promise the rest of the plugin is built around: it drives the badge, the countdown, the customer emails, and — if you use them — the automatic status changes when the date arrives. Set one you can keep.
3. Confirm the storefront display#
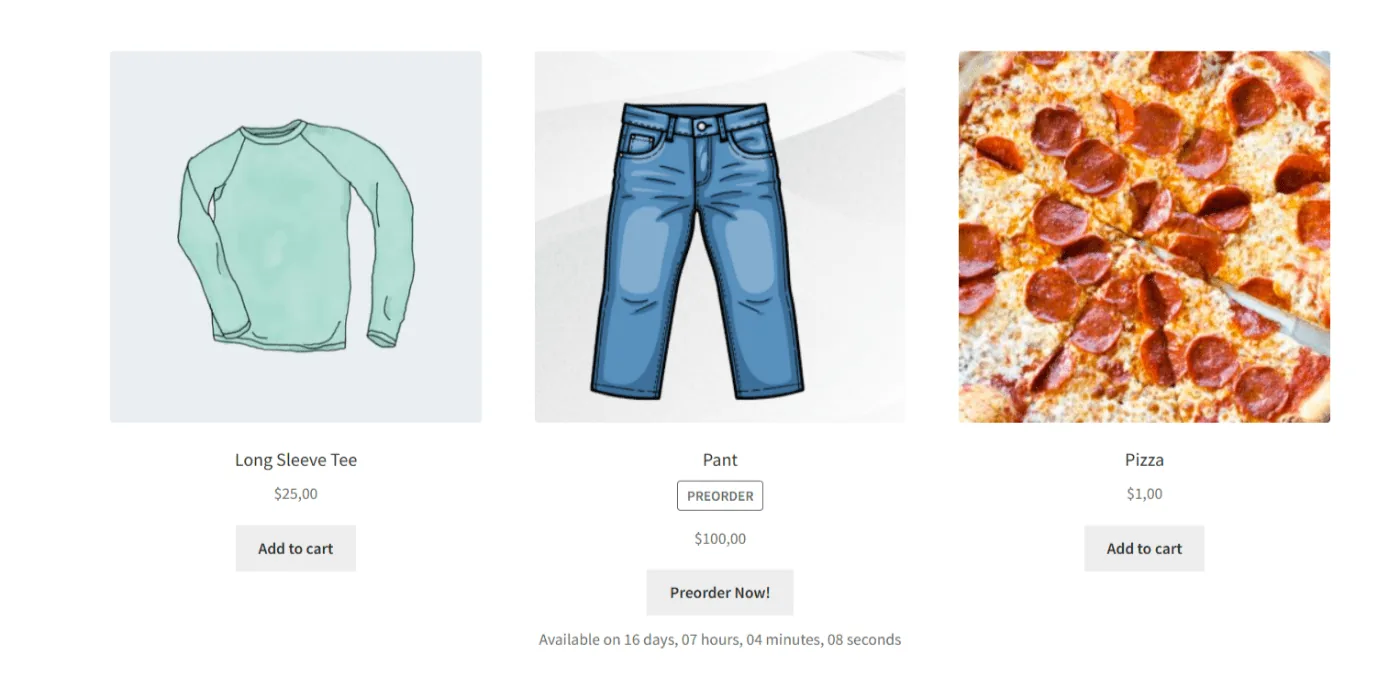
Open the product page as a shopper would and check that the availability date and the pre-order button are both there. If you turned on catalog display in settings, check the Shop page too — a product that reads as a pre-order on its own page but as ordinary stock in the listing will generate exactly the confusion you installed this to avoid.
What Free includes, and what Pro adds#
Free covers the essentials: mark a product as a pre-order, show an availability date, and take the order. For a single launch, that is often enough.
Pro is for when pre-orders become part of how the store runs rather than a one-off. It adds:
- Additional pre-order modes, including charging on release rather than at checkout
- Pay Later workflows, so a reservation costs the customer nothing up front
- The full set of pre-order email templates
- Automation around the availability date, including order status changes and stock handling
Next steps#
With one product live, the next decisions are how you want to charge and what your customers hear from you:
- Rewrite the customer-facing text so the buttons and notices sound like your store
- Combine pre-orders with deposits if you want part payment up front
Updated on April 22, 2026 · Need help? Open a support ticket