
Quick Summary
- General Settings: Set the global default status applied to standard new checkout orders.
- Payment Methods: Directly map payment gateways (e.g., Bank Transfer) to specialized custom statuses (e.g., Verifying Payment).
- Add New Status: View and manage your custom operational statuses in one centralized dashboard.
General Settings (Default Order Status)
Path: Bright Plugins → Order Status Settings → General Settings.
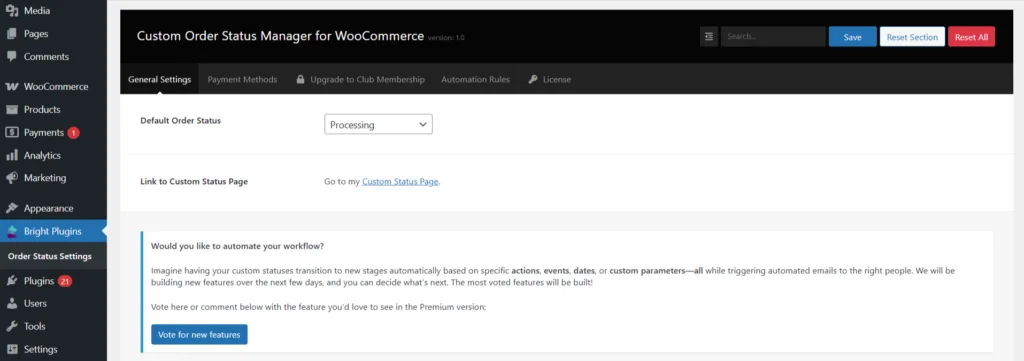
This panel establishes how WooCommerce handles newly created orders globally.
- Default Order Status: Choose the fallback status applied to standard checkouts (typically Pending Payment or Processing).
Payment Methods (Gateway → Status Mapping)
Path: Bright Plugins → Order Status Settings → Payment Methods.
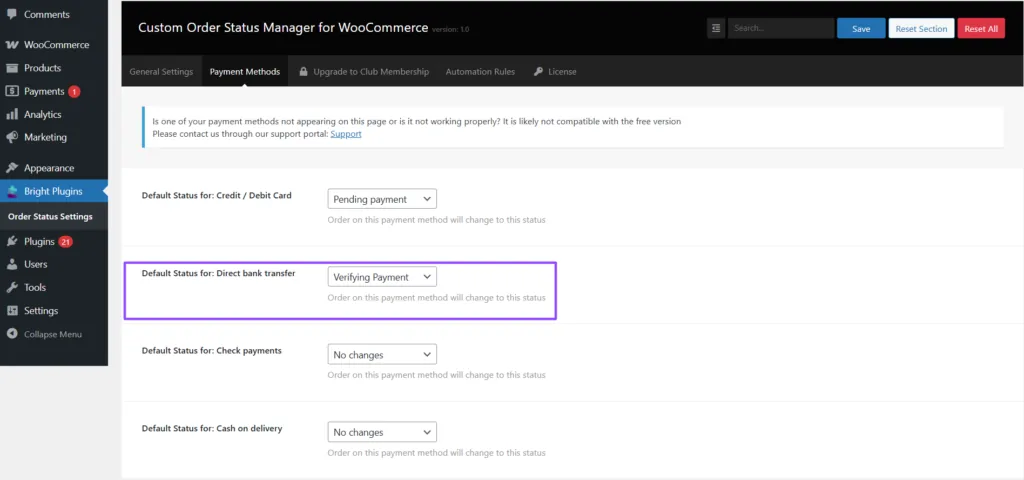
Bypass the global default status by assigning precise, automated order statuses depending on how the customer completes their payment.
- The “Verifying Payment” Case Study: Direct Bank Transfers (BACS) in WooCommerce default to “On Hold,” mixing payment-pending orders with stock or shipping issues. Mapping the Direct Bank Transfer (BACS) gateway to your custom Verifying Payment status ensures immediate operational clarity.
- How to map it: Scroll down to the Direct Bank Transfer gateway, open the dropdown menu, and select Verifying Payment.
Custom Order Statuses (Overview)
Path: WooCommerce → Orders → Order Status.
This dashboard is your control center for creating and managing custom workflow badges.
- Add New: Build tailored operational statuses, like Verifying Payment (Slug:
verifying-payment). - Visual Identifiers: Set high-contrast background colors and clean icons (like the signal/validation icon used for your Verifying Payment badge) to allow quick scanning of the orders database.
- Workflow Actions: Enable quick-action buttons so that as soon as your bank account registers the incoming wire transfer, your team can update the order to “Processing” with a single click from the list.
Need a step-by-step tutorial on building your first status? Read our detailed guide onHow to Create Your First Custom Statusto configure a hands-on Manufacturing workflow.
Updated on July 15, 2026 · Need help? Open a support ticket