
Quick Summary
- Add a new status with a clear Title & Slug (e.g., Manufacturing).
- Set the Icon, Colors, Status View, and enable Actions / Bulk visibility.
- (Optional) Enable the email notification and verify the status in Orders.
Open the “Add New Status” form
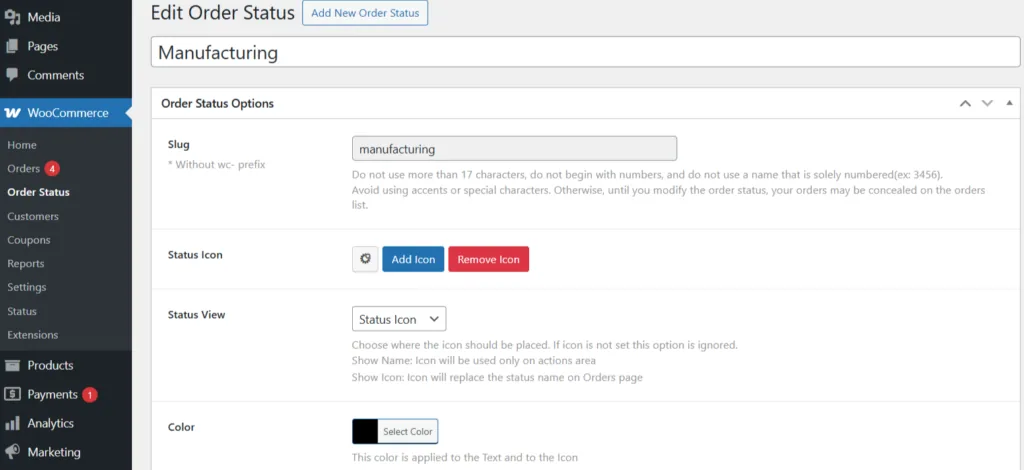
Path: WooCommerce → Order Status → Add New.
Define Title & Slug
For this guide, we will configure an operational status called Manufacturing to keep the workflow consistent:
- Title: Manufacturing (What your team and customers will read).
- Slug:
manufacturing(Always lowercase, no spaces, and without the wc- prefix). - Keep the text short, specific, and avoid marketing words.
Set Icon, Colors & Status View
- Click Add Icon and select a recognizable icon (e.g., a gear or wrench for Manufacturing).
- Set the Color and Text Background Color to ensure the badge contrast is readable (e.g., black text on a yellow background).
- Status View: Choose whether to display the Name or the Icon in the general WooCommerce orders list.
Show it where the team works (Actions & Bulk)
Enable both settings to ensure the status is fully operational during your team’s daily routine:
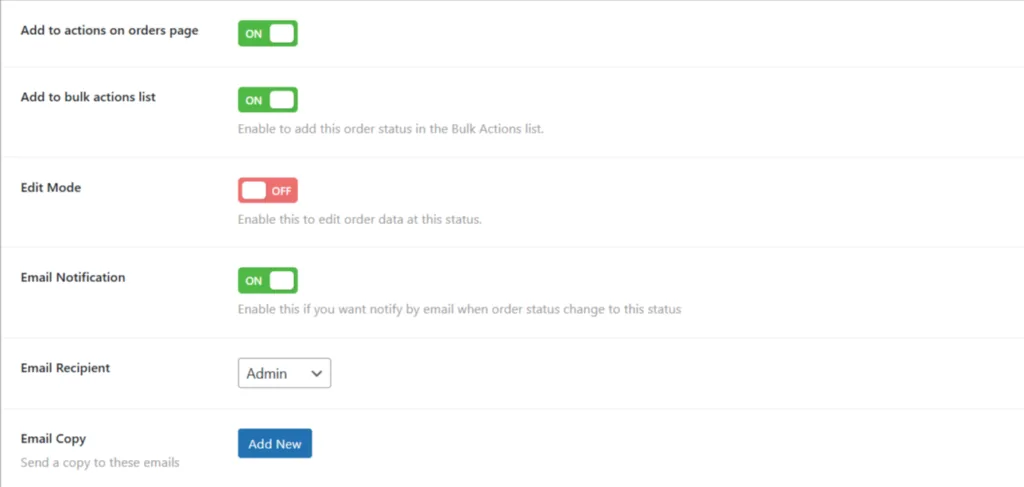
- Add to actions on orders page → ON
- Add to bulk actions list → ON
Notify via email (Optional)
Turn on the built-in email notification for this specific status and define the recipients:
- Email Notification → ON
- Recipient: Customer (default) and/or Admin.
- Email Copy: Add extra addresses if needed.
Business logic toggles (Optional)
Use these switchers only if they match your payment gateway or inventory workflow:
- Paid Status: Counts the order as paid in WooCommerce core reports and statistics.
- Download Access: Grants access to downloadable products immediately when the order is shifted to this status.
Save and verify in Orders
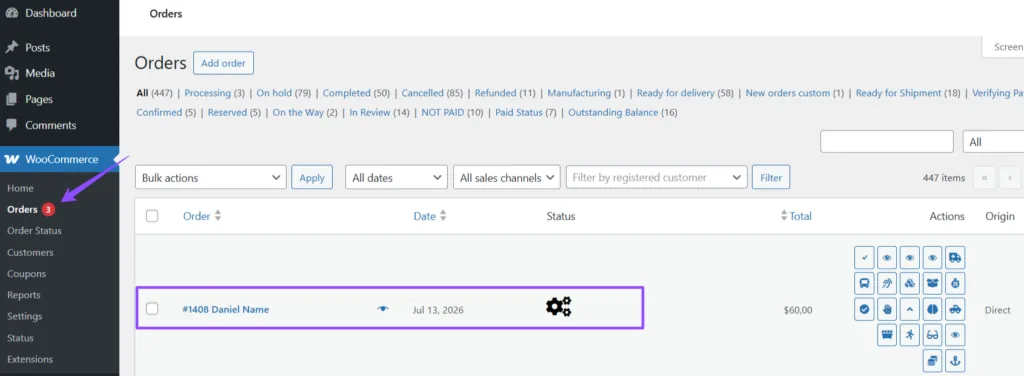
Click Publish/Save. Then, navigate to WooCommerce → Orders and confirm:
- The Status column shows your new badge (Manufacturing) on a test order.
- The status is available in the quick-action buttons on the right side of the list and inside the Bulk actions dropdown menu.
Send yourself a test (Optional)
Manually transition an existing order to your new status:
- Confirm that the order notes / history log registers the change correctly.
- If you enabled the email, verify the message arrives in your inbox with the correct subject (you can edit email templates later in WooCommerce → Settings → Emails).
Updated on July 15, 2026 · Need help? Open a support ticket