Por que é importante usar o cronômetro de contagem regressiva?#
The countdown timer on products helps create a sense of urgency, encouraging customers to act quickly to take advantage of an offer or purchase a product before it runs out. This is especially useful during promotions and high-demand periods.
Guia passo a passo para configurar o cronômetro de contagem regressiva#
1. Como posso acessar as configurações do BrightPlugins?#
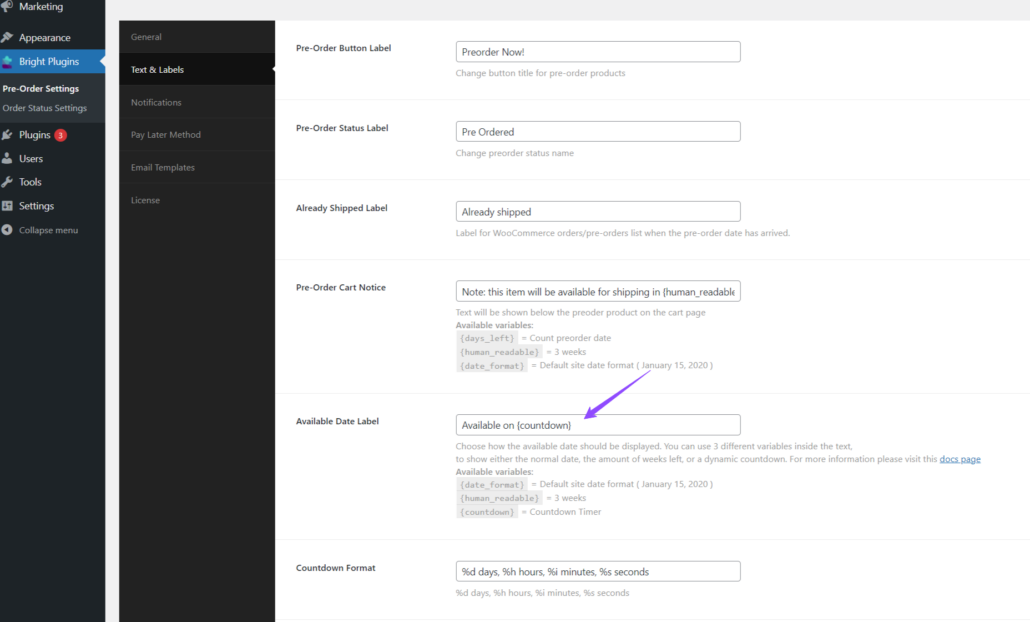
Store administrators should navigate to the WordPress admin panel and follow this path: BrightPlugins > Pre-Order Settings > Text & Labels.
In the Available Date Label option, select the {countdown} variable. This is the option we will highlight in this article. There are two additional options, but we will not cover them this time

2. Como posso configurar a posição do temporizador de contagem regressiva?#
After selecting {countdown} in Available Date Label, you can choose where the countdown timer will be displayed on the product page using the Available Date Position option.
To set this position, go to BrightPlugins > Pre-Order Settings > General.

3. Como posso configurar o produto?#
Certifique-se de que seu produto esteja configurado corretamente como simples ou variável de acordo com suas necessidades. Se você precisar de ajuda para configurar produtos simples ou variáveis, verifique os seguintes links:
- Como configurar um produto simples no WooCommerce
- Como configurar um produto variável no WooCommerce
4. Como posso visualizar o cronômetro de contagem regressiva?#
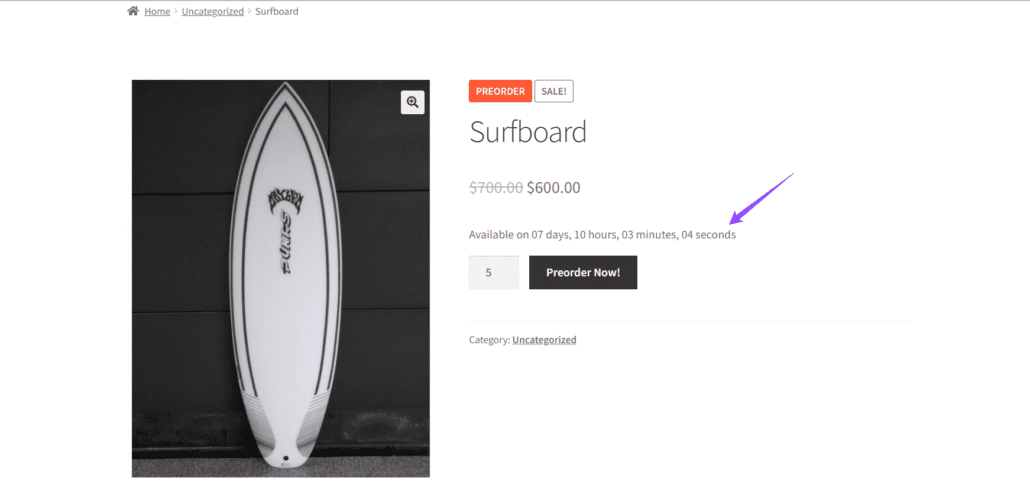
Once you have configured the product and selected {countdown}, the countdown timer will be displayed on the product page, indicating the time remaining until the product is available or the offer ends, in the chosen position.

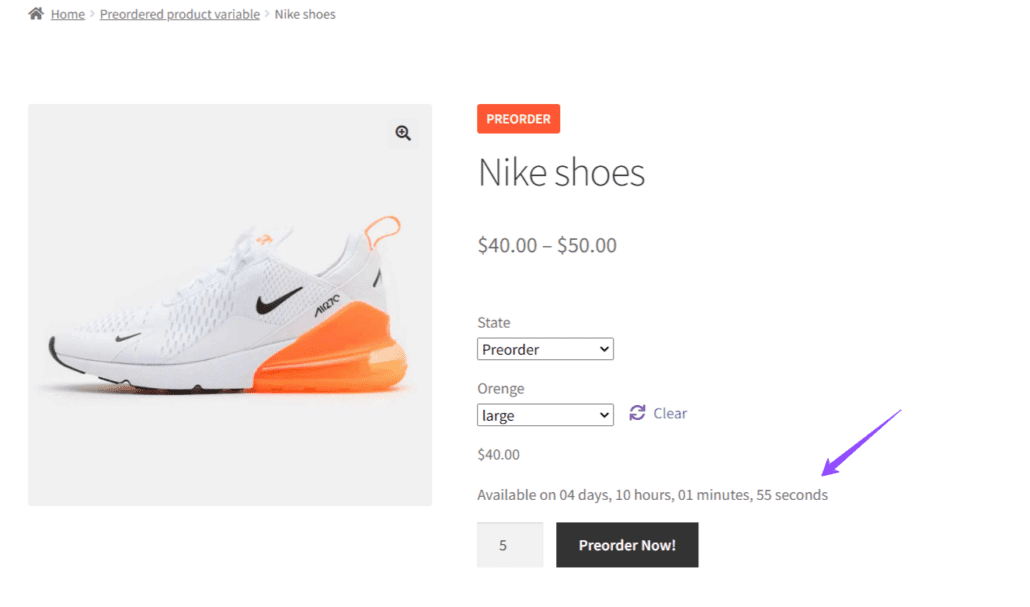
Example for Variable Product
For a variable product, after selecting {countdown}, the countdown timer will similarly show the time remaining on the product page.
