WooCommerceの無料ギフトを設定し、1つ買うと1つ買う方法が1つになる
How to Setup WooCommerce Free Gifts and Buy One Get One Deals? People love getting free stuff. That’s why Buy One Get One Free promotions are so great for both you and your customers. They buy something from you そして get something for free. It’s a win-win!
ウェブサイトでBOGOプロモーションを設定するには、WooCommerceの無料ギフトとBOGOセールを設定する方法をこちらでチェックしてください。
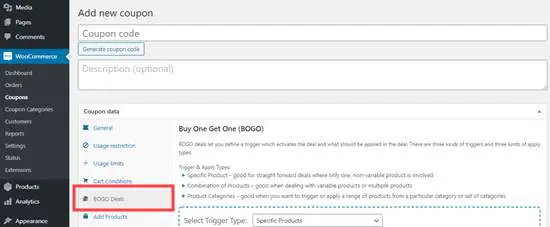
BOGO 拡張機能をダウンロードしてインストールする
First, you need to download the BOGO extension from the WooCommerce website. Simply browse the extensions for “buy one get one free.” Once you’ve downloaded the file, go to WordPress管理画面 .
選ぶ プラグイン>新規追加 そうしたら プラグインをアップロードします。 Choose the downloaded file to upload. Install and activate it, and don’t forget to go to WooCommerce >拡張機能 をクリックし、[サブスクリプション] タブでサブスクリプションをアクティブ化して、すべての更新プログラムを確実に取得できるようにします。
一般的なBOGO設定
オファーの設定を構成するには、 WooCommerce >設定>商品> 1 つ買うと 1 つ無料になります。
ここでは、対象の景品をカートの後に(1)表示するか、ショートコード[wc_choose_your_gift]を含むページに(2)を表示するかを選択できます。カート オプションのタイトルを設定するか、ショートコード オプションを使用する場合にギフト ページを選択できます。
The next box offers you a spot to put a little message to your customers inviting them to choose a gift. The button text is also customizable for the link to the “choose your gift” page.
下部にある、顧客がカートにBOGO商品を持っている場合にクーポンの使用を無効にするボックスをオンにすることができます。
BOGO ルールの追加
Go back to WooCommerce in the dashboard of WordPress and select Buy One Get One. You’ll see a screen with a button inviting you to “Create your first BOGO rule.”
をクリックします。 BOGO ルールの追加 開始する。ルールを設定したら、そのルールにカーソルを合わせて編集することもできます。ルールに名前を付けると、ルールが作成されます。
BOGO ルールを洗練するには、次の 3 つのセクションにアクセスできます。 一般、制限、 そして 使用制限。
General – How to Setup WooCommerce Free Gifts
このタブの上部には、ルールを有効または無効にするためにオンまたはオフにするボックスがあります。
次に、取引モードボックスには次の3つのオプションがあります。
●商品を購入すると、同じ商品が無料で手に入ります。
●商品を購入すると、別の商品が無料で手に入ります。
● 2 つ (またはそれ以上) の製品を購入すると、最も安いものが無料で入手できます。
These options allow you to limit the customer’s free item to either the same product as the one they bought or a specific different product. Alternatively, the customer can order two items and get the cheapest one free. This allows them to choose their free gift.
ページ上の残りのボックスは次のとおりです。
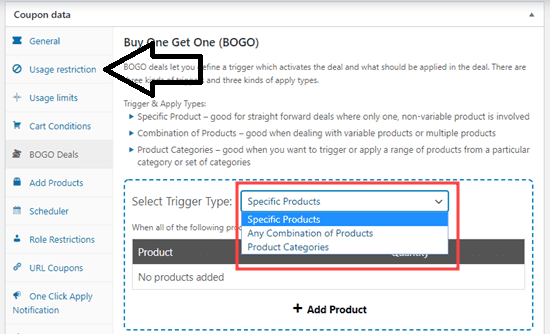
● 適用対象: ルールを特定の製品に適用したり、製品カテゴリを選択することができます。
● 製品/カテゴリ: ルールを適用する製品または製品カテゴリを指定できます
● 購入数量: 無料アイテムの資格を得るためにユーザーがカートに必要なアイテムの数を選択できます。
● 無料数量を入手: これにより、ユーザーが購入数量の倍数を購入したときに獲得できる無料アイテムの数を指定できます。
WooCommerce 無料ギフトの設定制限
このセクションは、人々が無料アイテムに夢中になりすぎないようにするのに便利です。このタブには 2 つのボックスがあります。
● 無料アイテムの制限: allows you to choose the maximum number of free items a user is eligible for when buying multiples of the buy quantity. You can leave it blank if you don’t want to limit this.
● ユーザーあたりの使用制限: this allows you to limit the number of times an individual user can use the rule. Leave blank if you don’t want to limit this.
使用制限
最後に、このセクションでは、プロモーションを特定のパラメーターに制限できます。
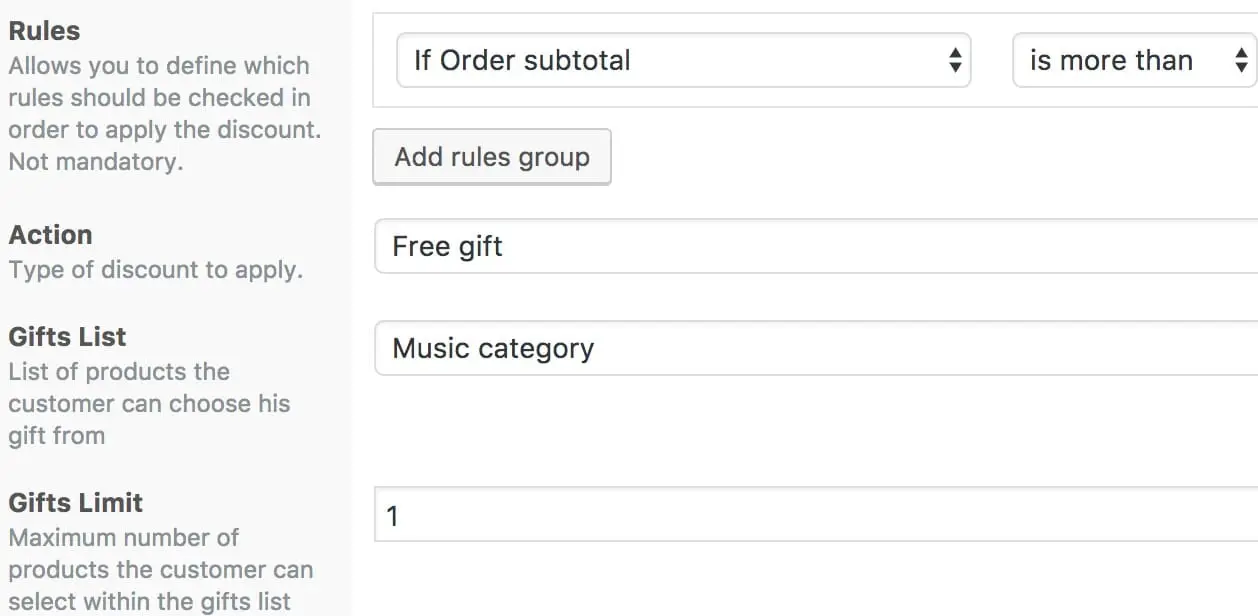
● 最低支出額: allows you to require that customers spend a certain amount before the rule kicks in. This total is based on the cart’s subtotal + tax – the coupon discount. You can choose to leave it without a minimum.
● クーポン: ルールの対象となるために顧客にクーポンの使用を要求する場合は、この制限をここに追加してください
● 除外する: これにより、ルールの対象とならない商品を指定できます。
● 許可されるユーザーロール: これにより、特定のユーザーロールのみが適格であることを指定できます。空白のボックスは誰でも使用できることを意味します
● 開始日と終了日: プロモーションの開始日と終了日(特定の期間に制限する場合)
Start Your Promotion! – How to Setup WooCommerce Free Gifts
That’s it! Once you’ve got the plugin configured the way you like, it’s time to start promoting your offer. Customers will love their free gifts, and you’ll enjoy the new sales rolling in.
Bright Vesselへのお問い合わせはこちら あなたの素晴らしい取引を宣伝するのを手伝ってください!
私たちは明るいプラグインです
ブライトプラグイン チームは、WordPressとWooCommerceで認定されたフルスタック開発者で構成されています。 私たちは、店舗オーナー、代理店、専門家にクラス最高のプラグインを提供しています。


