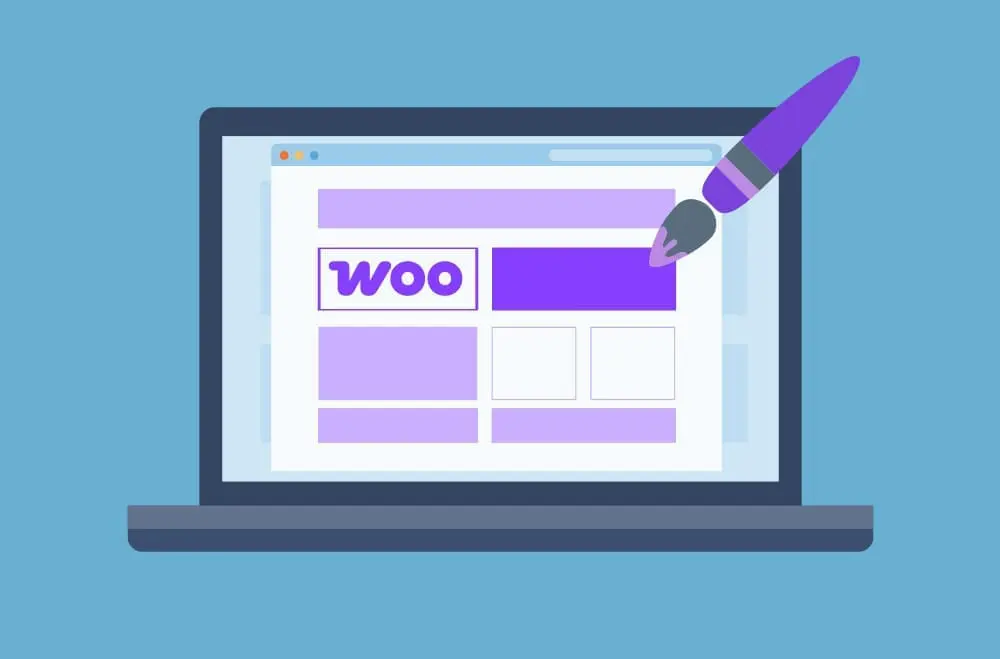
How to Set Up One-Page Checkout in WooCommerce Plugin (Step-by-Step Guide)
A smooth and fast checkout process enhances conversions and minimizes cart abandonment in WooCommerce stores. One-page checkout plugin offers a simplified alternative to traditional multi-step checkouts by consolidating the entire purchase process into a single, streamlined page. This approach helps eliminate unnecessary clicks and confusion, making it easier for customers to complete their transactions.
The one-page checkout for the WooCommerce plugin enhances the user experience by reducing friction at the final stage of the buyer’s journey. It encourages shoppers to complete their purchases without hesitation, leading to higher satisfaction, fewer abandoned carts, and, ultimately, better revenue performance for your store. As mobile shopping continues to rise, this efficiency becomes even more valuable for e-commerce success.

The bar graph shows the adoption trend of One-Page Checkout plugins in WooCommerce from 2022 to 2025. As seen, usage is projected to grow steadily yearly, reflecting its importance in boosting conversions and reducing cart abandonment through a simplified checkout process.

What is the One-page Checkout Plugin for Woocommerce?
One-page checkout in WooCommerce is a streamlined solution that consolidates all the essential elements of the purchase process, including product selection, cart review, and payment, onto a single, unified page. Instead of navigating through multiple steps or pages, customers can complete their transactions from one convenient interface. This dramatically reduces the number of clicks, page loads, and time spent during checkout, making the entire process more efficient and less prone to cart abandonment.
This checkout is especially beneficial for mobile users or first-time customers who may be discouraged by lengthy or complex checkout forms. Store owners remove potential friction points by displaying everything on a single page, such as unexpected shipping steps or login requirements. The result is a smoother, more predictable path to purchase, which often translates to higher conversion rates and a better overall user experience.
Key components of one-page checkout for WooCommerce include:
- Product Selection: Customers can choose products and adjust quantities directly from the checkout page.
- Cart Summary: A real-time cart preview shows item details and totals without redirecting the user.
- Billing and Shipping Forms: All necessary customer information is collected without requiring page navigation.
- Payment Options: Users can select and complete payment on the same screen.
- Order Review: The entire order is displayed for confirmation before submission.
Why Should You Implement One-Page Checkout for WooCommerce Plugin?
Implementing a one-page checkout plugin in your WooCommerce store is one of the most effective ways to reduce friction in the purchasing process. Traditional multi-step checkouts often require customers to navigate several pages to complete a purchase, which can be overwhelming, especially for mobile users or first-time buyers. Each additional step creates a new opportunity for abandonment. The one-page checkout plugin for WooCommerce solves this by placing product selection, cart review, and payment entries on a single screen, allowing users to complete their orders faster and with less effort.
This streamlined experience is more convenient and encourages conversions by eliminating common pain points like slow-loading pages, form fatigue, and confusion. With everything displayed and easy to manage, users feel more in control of their purchases. It’s especially beneficial during promotional events or flash sales, where urgency and speed are critical. The result is a checkout process optimized for performance and user satisfaction.
Key benefits of using one-page checkout plugins for WooCommerce include:
- Enhanced User Experience: By displaying all checkout elements on one page, customers enjoy a faster and more intuitive flow from cart to payment.
- Reduced Cart Abandonment: Fewer steps and less confusion mean customers are less likely to leave the site before completing their purchase.
- Higher Conversion Rates: A simplified checkout flow encourages more users to complete transactions, improving overall revenue.
- Mobile-Friendly Design: One-page checkout plugin layouts are typically more responsive, ensuring that mobile users can complete their checkout process without hassle.
- Faster Decision-Making: Customers can review their cart, apply coupons, and finalize their order in one view, boosting confidence and reducing hesitation.
Setting up a One-page Checkout for the WooCommerce plugin Involves Several Key Steps:
1. Choose the Right Plugin
Selecting the right plugin is the foundation of successfully implementing a one-page checkout plugin in your WooCommerce store. A good plugin allows you to merge all checkout steps onto a single page and provides flexibility, customization, and compatibility with your existing store setup. Before deciding, consider your store’s design requirements, the types of products you sell, and your customers’ checkout behavior. Look for features like drag-and-drop builders, pre-built templates, support for upsells, and compatibility with popular payment gateways.
Two of the most trusted and feature-rich plugins for this purpose are WooCommerce One-Page Checkout Plugin and FunnelKit Checkout. These tools streamline creating a one-page checkout and offer several advanced features to enhance the user experience and boost conversions.

1. WooCommerce One-page Checkout
The WooCommerce One-Page Checkout combines product selection and checkout into a seamless page. After adding a product, customers are instantly redirected to a checkout that displays cart and payment details, minimizing clicks and streamlining the purchasing process. This is ideal for boosting conversions and reducing cart abandonment.
Key Features:

Single-Page Checkout: Combines cart and checkout forms into a unified interface for faster checkout.

- ‘Buy Now’ Button: This feature adds a dedicated button on product pages for instant checkout without navigating the cart.
Custom Redirects: This feature lets you choose where customers go after adding to cart checkout, custom URLs, or category/home pages.

- Priority Support: Includes one-year updates and email support with responses within 24 hours for Pro users.

2. FunnelKit Checkout
FunnelKit Checkout is a powerful WooCommerce extension that replaces the default checkout with fully customizable, high-converting templates available in single-page and multi-step formats. It supports complete design flexibility without coding, seamless integrations, and conversion-focused optimizations.
Key Features:
- Pre-built & Custom Templates: Choose from ready-made designs or craft unique checkout layouts using Elementor, Divi, Gutenberg, Oxygen, and other builders.
- Replace Default WooCommerce Checkout: Set your FunnelKit template as the main checkout page in just a few clicks.
- Product-Specific & One-Page Checkout: Create targeted checkout pages for individual items, embedding products, images, and special offers.
- Embed Checkout Forms via Shortcode: Use simple shortcodes to place checkout forms on landing pages or within site content.
- Conversion Enhancements: Includes features like collapsible mobile summaries, sticky payment buttons, progress bars, Google Autocomplete, inline validation, express payment support, and auto-apply coupons.
- Analytics & Upsells: Track checkout performance and boost AOV with order bumps and post-purchase offers.

3. CartFlows
CartFlows offers a comprehensive sales funnel system for WooCommerce, with a strong emphasis on conversion-focused one-page checkout flows. Its drag-and-drop builder enables custom layouts, making it perfect for marketers who want complete control over the checkout journey.
Key Features:
- Visual Funnel Builder: Create custom checkout flows using a drag-and-drop builder compatible with Elementor and Gutenberg.
- One-Page Templates with A/B Testing: Use ready-made templates and test variations to optimize checkout performance.
- Upsells, Downsells, and Order Bumps: Boost revenue with built-in features that add offers throughout the checkout process.
- Abandonment Recovery & Analytics: Monitor user behavior and recover lost sales with real-time insights and follow-ups.

4. PeachPay
PeachPay simplifies the checkout process with an express one-page overlay that integrates directly into product and cart pages. It’s lightweight, fast, and optimized for global transactions, supporting multiple gateways and currencies.
Key Features:
- One-Click Checkout Anywhere: To streamline the purchase process, enable instant checkout from products, carts, or custom pages with pre-selected product options.
- Global Payment Support: It integrates seamlessly with Stripe and PayPal and supports over 135 currencies, making it ideal for international stores.
- Google Address Autocomplete & Autofill: Speeds up checkout by suggesting accurate address entries and auto-filling customer details to reduce form friction.
- Mobile-Optimized & Brandable Design: Fully responsive layout designed for mobile users, with customizable styling to match your store’s branding.

5. Flux Checkout by Iconic
Flux Checkout offers a stylish and friction-free one-page checkout experience with step transitions and real-time feedback. It’s built with mobile-first in mind and integrates smoothly with existing themes.
Key Features:
- Step-Based One-Page Design: This design uses a slide-style interface to guide users through a clean, single-page checkout, reducing friction and confusion.
- Mobile & Tablet Optimized: Fully responsive with touch-friendly elements, ensuring a smooth device experience.
- Address Validation with Google Autocomplete: Speeds up form entry and minimizes errors with innovative address suggestions.
- Custom Fields & Styling: Show or hide fields dynamically and match the checkout design with your brand’s look and feel.
2. Install and Activate the Plugin
Once you’ve chosen the best one-page checkout plugin for your WooCommerce store, the next step is to install and activate it. This process is typically straightforward, even for users with limited technical experience. Properly installing the plugin ensures it integrates correctly with your site and functions as intended. Always ensure you’re using the latest version of the plugin and that it is compatible with your current WooCommerce and WordPress installations.
Steps to install and activate the plugin:
- Purchase and Download: Secure the plugin from a trusted source such as WooCommerce.com or the official developer’s site.
- Upload via WordPress Dashboard:
- Go to Plugins > Add New
- Click Upload Plugin
- Select the .zip file you downloaded
- Click Install Now
- Activate the Plugin: Click ‘Activate’ after installation to enable it on your site.
- Verify Activation: Ensure the plugin appears in your list and doesn’t conflict with other installed tools.
3. Configure Plugin Settings
After installing and activating your chosen One-Page Checkout Plugin for WooCommerce, the next important step is configuring its settings to align with your store’s needs. Each plugin typically provides a settings panel where you can control how the checkout page appears, functions, and interacts with other parts of your WooCommerce store. Taking time to fine-tune these settings ensures a cohesive and user-friendly experience for your customers.
Configuration options may vary depending on the plugin. Still, they will most likely allow you to customize the layout, turn specific form fields on or off, and integrate with your store’s existing payment gateways. You’ll also have options for styling the page to match your brand, adjusting mobile responsiveness, and optimizing performance. Proper setup at this stage enhances usability and minimizes potential checkout friction.
Key settings to configure include:
- Design Customization: Adjust the layout, font, color scheme, button styles, and spacing to align with your brand’s visual identity.
- Field Management: You can choose which form fields to show, hide, or make optional, streamlining the process while collecting essential customer data.
- Checkout Behavior: Enable dynamic updates to automatically refresh totals and cart contents as users interact with the page.
- Payment Gateway Integration: Ensure your store’s preferred payment methods (e.g., PayPal, Stripe, credit cards) are enabled and working seamlessly.
- Mobile Optimization: Adjust the appearance of elements on smaller screens to provide a responsive experience for mobile shoppers.
- Coupon and Promo Code Settings: For streamlined discounts, you can add or hide promo code fields or enable an automatic coupon application.
4. Create a One-Page Checkout Page
Once your plugin is configured, the next step is to create a dedicated page where the One-Page Checkout Plugin for WooCommerce will be displayed. This page is the core of your streamlined checkout experience, combining product selection, cart summary, and payment fields in a single view. Creating this page correctly ensures customers experience a fast, intuitive, and frictionless journey from product interest to final purchase.
Whether using WooCommerce One-Page Checkout or FunnelKit, you’ll typically be given a shortcode or block to embed the checkout form. You can create a fully functional One-Page Checkout Plugin for WooCommerce by placing this shortcode on any new or existing WordPress page. This flexibility enables you to design targeted landing pages for specific products, bundles, or seasonal offers while maintaining a simple and efficient purchasing process.
Steps to Create Your One-Page Checkout Plugin for WooCommerce:
- Create a New Page: Go to your WordPress dashboard and navigate to Pages > Add New.
- Name the Page: Use a clear and conversion-focused title, such as “Fast Checkout” or “Buy Now.”
- Insert the Shortcode or Block: Paste the plugin’s shortcode (e.g., [funnelkit_checkout] or [woocommerce_one_page_checkout]) into the content area.
- Customize Layout (Optional): Use the block editor or page builder to arrange additional content, such as product descriptions, images, or trust signals.
- Publish the Page: Once everything is in place, click Publish to make the checkout page live and ready.
- Link the Page: Update your navigation menu, product buttons, or promotional banners to link directly to this new one-page checkout.
5. Test the One-Page Checkout Plugin for WooCommerce Process
Before making your One-Page Checkout Plugin for WooCommerce live, it’s crucial to thoroughly test the entire process to ensure it functions smoothly across all devices and payment methods. A seamless checkout experience is essential for establishing trust and minimizing the risk of cart abandonment. Even a minor technical glitch or confusing layout can deter a customer from completing a purchase. That’s why testing should cover everything from form field validation to real-time cart updates and payment gateway responsiveness.
Conducting several test purchases allows you to identify any usability issues, design inconsistencies, or compatibility conflicts with your existing theme or plugins. Don’t just check it on a desktop. Ensure it works on various screen sizes and browsers. This step also helps verify that transaction data is appropriately recorded in your WooCommerce dashboard, emails are triggered correctly, and mobile shoppers have a frictionless path to payment.
Key areas to test:
- Place Test Orders: Simulate purchases using test payment methods to verify the flow from the cart to order confirmation.
- Check Field Functionality: Ensure all required fields function correctly and that validation messages are displayed when needed.
- Mobile Responsiveness: Utilize mobile and tablet devices to ensure the layout adjusts appropriately, with no elements cut off or misaligned.
- Coupon Code Functionality: Confirm that coupons can be entered and applied without disrupting the checkout experience.
- Payment Gateway Processing: Verify that transactions are processed successfully through multiple gateways (e.g., PayPal, credit card, Stripe).
- Email Notifications: Confirm that confirmation emails are sent to the customer and that store admins receive order notifications.
- Performance Speed: Ensure the checkout page loads quickly and responds to real-time changes (e.g., quantity updates and shipping selections).
What Are the Best Practices for an Effective One-page Checkout for Woocommerce?
Creating a One-Page Checkout Plugin for WooCommerce is the first step; optimizing it for performance, usability, and trust drives conversions. An effective one-page checkout should be clean, fast-loading, and focused only on essential elements. By minimizing distractions and streamlining the purchasing process, you can reduce the likelihood of cart abandonment and enhance the overall customer experience.
Follow a few proven best practices to enhance your one-page checkout. These strategies help create a checkout page that looks good and performs exceptionally well across devices and customer segments. Each detail, from form field design to mobile compatibility and trust-building techniques, increases your sales.
Best practices include:
- Simplify the Form: Ask only for the information necessary to complete the order, and avoid long or redundant fields that can overwhelm customers.
- Enable Guest Checkout: This allows users to check out without creating an account, removing friction and speeding up the process for first-time buyers.
- Offer Multiple Payment Options: To accommodate diverse customer preferences, include popular gateways such as PayPal, credit cards, and local payment options.
- Ensure Mobile Compatibility: Use a responsive layout and test on multiple screen sizes to ensure usability for mobile and tablet users.
- Use Trust Signals: Display SSL certificates, secure payment badges, and privacy assurances to increase customer confidence.
- Provide Clear Navigation: Include easily accessible buttons for editing cart contents or returning to the product catalog if needed.
- Optimize Loading Speed: Compress images, use efficient code, and test your checkout page’s speed to prevent delays that could result in drop-offs.
How Can You Further Optimize Your One-Page WooCommerce Checkout?
Even after setting up an effective one-page checkout, several advanced strategies can be implemented to streamline the process further and maximize sales. These enhancements focus on refining the customer experience, minimizing friction, and leveraging tools to recover lost revenue. From cart abandonment tools to upsell plugins, optimizing your WooCommerce checkout is an ongoing process that delivers compounding benefits.
Analyzing customer behavior and continuously improving checkout elements can lead to significant gains in conversion rates. Offering flexible shipping, monitoring performance, and personalizing offers during checkout can turn one-time buyers into loyal customers. Leveraging data and automation is key to creating a frictionless and persuasive checkout experience.
Further optimization strategies include:
- Abandoned Cart Recovery: Use plugins or email automation to remind users to return and complete their purchase if they leave items in the cart.
- Checkout Upsell Plugins: Introduce one-click upsells or order bumps to increase the average order value without complicating the process.
- Streamlined Shipping Options: Keep shipping choices simple; offering free or flat-rate shipping helps prevent decision fatigue at checkout.
- Analytics and Monitoring: Utilize tools like Google Analytics or a built-in plugin for reporting to track drop-off rates and test improvements.
- Personalized Checkout Experience: Tailor messages, discounts, or offers based on customer behavior or cart contents for higher engagement.
- Auto-Fill and Address Validation: Enable features that automatically populate customer details or validate addresses to speed up form completion.
Explore More With Bright Plugins
If you’re looking to enhance your WooCommerce store’s functionality even further, Bright Plugins offers powerful, user-friendly tools designed to help you grow. Whether you need advanced checkout options, quantity management, or custom pricing strategies, their premium plugins enhance the shopping experience and boost conversions.
Trusted by WooCommerce users worldwide, Bright Plugins delivers easy-to-configure and feature-rich solutions. Their plugins are regularly updated and backed by responsive customer support, making them an excellent choice for store owners who want results.